
The Pros and Cons of Building Bespoke Software
A streamlined operation is a part of what helps businesses achieve their goals. Having an organized process means knowing you have the tools needed to meet operational objectives as a company—and this includes business software solutions.

Generally speaking, organizations need specialized software that fulfills their business needs. Developers understand these prerequisites and have the tools and skills needed to create the programs. Business software solutions are developed and used for completing complex business tasks and reporting activities in an automated manner.
Aside from streamlining processes, business software has other benefits to companies—it offers better productivity and improved control, lessens the risk of human errors, allows for effectiveness, consistency, and accuracy, and performs tasks in a shorter period to help reduce workload. Some of the standard business software solutions include the following:
- Word Processors: comes with spelling and grammar checker for error-free letters and reports.
- Email and Communication Programs: helps in information exchange within and outside the company.
- Recordkeeping Programs: comes with accounting or bookkeeping features for tracking sales and expenses.
- Human Resource Information System: handles HR roles like employee management, recruitment, employee record maintenance, training, and payroll.
With advancements in IT not showing signs of slowing down, new software solutions that can support business operations are being introduced daily. You have the option to either build the software with help from your developers or buy ready-made ones. But, how do you know which solution best fits your business’ needs?
Custom vs. Off-The-Shelf
A custom or bespoke software is a program that is made-to-order to aid the specific needs of a single company, while Off-the-Shelf software is commercially available to the general public. Custom solutions are made to cater your business’ unique requirements, but ready-made programs will require your business to adapt to its features.
Commercial software can also be packaged, wherein programs are grouped to provide different tools that are under the same family in one software. The applications share a few similar features but make a complete package for the user. The best example would have to be Microsoft Office and the tools under it, including Word, Excel, PowerPoint, and many others.
Since off-the-shelf software is made for the public, it is generally created to be user-friendly. The interface for bespoke, meanwhile, can be complicated since it’s customized for the professional who will use it. As for the price, commercial software is generally cheaper compared to custom since bespoke software is made exclusively for one company.
However, this price difference also entails risk. Commercial solutions may be more inexpensive but may not always have what you demand. You’re assured that a tailored option will fit your needs, but since it means working through custom software development, you would have to cover all the expenses involved in the process. In this case, you may risk paying the high prices but not get what you want in the end.
Bespoke Software: The Good and the Bad
Based on these differences, it may seem like bespoke software has a lot more advantages for businesses with unique challenges; but benefits sometimes come with disadvantages, as well. Before you decide on a customized solution for your business, consider the pros and cons of building your own software as opposed to purchasing commercial ones first.
Pros
Your Own Solution
Custom software is made for your business’ needs and is meant to be the solution to all of your organization’s problems. Therefore, it is unique to you, and you own the software (though you may have to check your agreement first if you tapped a third-party developer to do it for you). There’s no denying the value of product that purely exists for your company’s best interests.
Flexible Support and Updates
If needed, you can easily modify and expand your custom software to keep up with the changes in your business and with technology. You can also choose to update and improve your solutions at your own convenience. With custom software, your company can define the scope of features, the level of support, and overall design to fit your needs specifically.
No Security Issues
Commercial software can be quite risky. Since you’re sharing software with other users, your company may be in danger in case of a hack. For custom software, you can only be in jeopardy if the hacking is targeted to your software or company. Even then, developers can enhance security by integrating it with another security solution that they have.
Competitive Edge
Since the software is only made for you, your competitors won’t be able to use the same software, and you don’t have to share it with them. This gives you a competitive advantage that can’t be easily replicated.
Cons
Takes Time and Energy
Bespoke software is not a quick fix. The development phase, from understanding your business needs to discovering bugs before the actual launch, can take several months. Depending on the nature of your business—and while the process will eventually deliver a great solution—time may be of the essence and undergoing development hell may not be the best idea for you.
High Upfront Cost
As mentioned, developing custom solutions from scratch is not going to be cheap. However, the substantial upfront investment can result in robust solutions that can reward you with an even better amount of gains in the future.
Features May Be Limited
Readily-made solutions often cover a wide range of features, which can be convenient at specific instances. Bespoke ones won’t start as feature-rich; it may take some time to gradually make improvements along the way.
Dependent On Software Provider
Custom solutions need to be regularly updated and checked, which means you’d have to be reliant on your provider to maintain it. However, this can be easily remedied by choosing the right developer or company; one that you already have a good relationship with and are experts in the field.
Conclusion
Custom software development services are flourishing more than ever because businesses realize that they can use them to implement their unique ideas and USPs. It’s also ideal for those who want to get the most out of what technology has to offer, as long as you’ve got the time and resources to spend on development.
Some may even go the hybrid route: buy off-the-shelf solutions but also put in custom applications that can be integrated with commercial ones. This way, they can get both the fundamental features of off-the-shelf products and the unique services of customized solutions.
In the end, the best solution will depend on your business’s nature, needs, and budget. Choose the solution that will answer your challenges and organize your processes without going over your allocation.
Looking to build a custom software for your brand? Contact Intelligent Bee today to find out what we can do to grow and support your business!

The World Needs More Software Developers!
The rise of technology and digital tools in today’s modern world is evident. Everywhere you turn, you can see a student working on their laptop in a coffee shop or a kid playing games on their parent’s smartphone. The widespread use of smart devices is set to expand in the coming years, until one day, no one will be able to recall what life was like before phones and other gadgets.
Because of this, the demand for technical professionals has naturally increased. In fact, the role of software developer is the reigning “best job” in the U.S., according to data from the U.S. Bureau of Labor Statistics. Said survey identified jobs with the highest hiring demand, best work-life balance, and most competitive pay, among others.

Programmers aren’t just relevant in software development companies or industries that are “obviously” tech. Demand is growing in practically any industry that needs talented individuals to create digital applications. With the digital transformation many institutions are undergoing today, this growth in demand applies to the health sector, financial service industry, and education, to name a few.
What does this say about the future of software development and the increasing involvement of tech in various industries?
The Growth of Software Demand
More and more companies are on the hunt for software developers, but there aren’t enough people to fill the role. In the U.S. alone, there are over 200,000 open jobs for this role, and yet data shows that there are only around 30,000 computer science majors who graduate every year.
Following this trend, there will always be a shortage of software developers in the industry. It could take almost seven years to fill the current open roles. That’s not even accounting for the future projection that there will be about a million computer programming jobs expected to open by 2020.
Companies are understandably frustrated with this situation, but they still try to address the shortage in other ways. They are hard at work to make employees interested and excited about additional knowledge in programming, creating an emphasis on teamwork rather than technical know-how.
This means building opportunities in training workshops on coding, programming, and software development to current employees who might be interested in the field.
Homegrown talent is also a major trend in addressing the lack of qualified software developers.
Bloomberg featured the strategy of two businesses, JDA Software Inc. and Social Tables, who both have programming internship programs. A senior engineer is paired up with a rookie, and from there, the company will decide if a candidate will get absorbed or not.
While these techniques work for some businesses, not every organization is so lucky. There may be a lack of general interest in programming or too little resources to implement a training program, which points back to the need for software developers.
Quality Developers are Still Few and Far Between
Just as with any position, having people interested in the job is not enough for them to get hired. There may be existing programmers on the market, but their inexperience may throw off companies who want to hire someone with better skills.
Therefore, it’s not just the question of having a shallow talent pool to begin with, but also the skill level of those who do want to apply. Lack of experience is one of five hiring challenges for software developers, including lack of technical skills, high salary demands, lack of workplace competencies, and lack of formal engineering education.
Besides this, there is also a great struggle retaining talent in the software development industry.
Because of budget restrictions, start-ups have no choice but to hire entry-level programmers, whose skillsets may not quite cover all of the company’s needs. As the company grows, they will be able to afford mid and senior level developers who will inevitably spot the errors of their predecessors and fix it.This issue can get repetitive and tiresome for programmers. Instead of creating something new, they get trapped in an endless cat-and-mouse chase with errors and poor coding.
In effect, some developers willingly exit the industry after over-fatigue from repetitive work. It’s a difficult situation to escape from, seeing as the scenario above can turn into a vicious cycle.
Final Words
Here’s food for thought: How can software developers take your business to the next level? Just imagine all the possibilities.
Technology will continue to evolve at a much faster pace than most humans will understand. Even if there are enough software developers in the world, the opportunities that new tech will bring are infinite. There will always be something new to learn, and that’s an exciting thing!
In practically any industry you put them, software developers can help make the businesses more effective. There’s a high demand for them, and this will only grow in the coming years. Supporting educational programs and opening up training for people who are interested are good ways to contribute to the reproduction of software developers worldwide.
Are you a prolific software developer? We want to hear from you. Visit our careers page today!

When Should Businesses Outsource Custom Software Development?
Most, if not all companies have a common goal – and that’s to be the best in their field. As industries are becoming more globally competitive, it’s crucial that you continuously evaluate and improve the way you do things to avoid being left behind. It’s also critical that you make the right business decisions, such as when or why you should outsource your company’s digital application or software development needs.

Here are different scenarios where you might need to tap the services of an external custom software development team for your business:
When you’re trying to focus on core business areas
IT work takes up time, which might prevent you from concentrating on core business activities that drive revenue. If you see that building your IT projects takes time away from your main business, you might be working on your priorities all wrong.
When you free yourself from IT-related tasks, you can focus your assets and resources more appropriately on your company’s area of expertise. This can help you establish leadership in your industry since you’ll have more time to innovate your current offerings, resulting in better customer satisfaction along the way.
When you lack the budget
A low budget for your IT department can be a significant challenge, mainly because developing software is costly. You’ll have to pay upfront costs to build your IT infrastructure, purchase development tools and licenses, and hire and train IT staff. These costs can further increase as your team grows.
By contrast, there aren’t many overhead costs involved when you decide to outsource custom software development to third-party contractors. Often, these vendors offer full-cycle development services in custom software, mobile application, and web application development at cost-effective rates.
When you’re short on expert developers
Software development has a very technical nature to it, which makes it mandatory that you hire only the most experienced developers. If you don’t have access to highly skilled developers, you should definitely consider outsourcing a team.
Expert developers have more experience in this field and will be able to better design software that suits the specific needs of your business. As they work on your project, they can anticipate possible problem areas and immediately make helpful recommendations.
Hiring developers with complete skill sets can lead to many positive things once the software goes live, including optimum efficiency and usability levels, better security, and ultimately, a high return on investment (ROI).
When you don’t have the infrastructure
You’ll need to invest in a formal tech infrastructure for software development. However, if your business model isn’t directly related to this discipline, it might be unwise to build an IT infrastructure from scratch in-house.
In their years of being in the business, outsourcing companies have already established a robust IT infrastructure. They have state-of-the-art technologies and solutions to address even the most complex projects. Your business will also benefit from a fully functional IT infrastructure, so the security of your customer data and other company resources will not be compromised.
When you lack support and maintenance manpower
Software design or development is not a one-time project. You’ll need to continually monitor and modify how it works, depending on the needs, demands, or expectations from end-users.
If your company doesn’t have a dedicated team of tech support, your product could quickly become problematic. An outsourced team will be responsible for introducing new features and fixing system bugs to make sure that the product works as efficiently as possible. This way, you don’t have to replace or rework the software altogether every time an issue shows up.
When you have limited access to cutting-edge technology
When it comes to technology, things are always moving in the fast lane. What’s new today may not be so unique tomorrow, with developers constantly coming up with and releasing more advanced programs. To help your company adapt to rapid technological shifts, you can look to outsourcing companies since they have ready-access to the latest technologies, tools, and resources relevant to software development.
When product movement is quite slow
Tech guys agree that dev work is a step-by-step process, where shortcuts are not always possible. Then again, there’s the business perspective that the sooner you can get your product out there, the better.
To prevent your company from having to deal with this dilemma, you’ll need to exert more control over how long your software development takes to finish. Software development companies recognize this need and are reliable enough to deliver what’s expected of them within a reasonable timeline.
When your quality assurance processes are insufficient
Outsourcing companies take pride not only in their technical expertise but also on their knowledge about market trends, which allows them to deliver high-quality work to clients. With their technical skills, they can help you improve your products to deliver an enhanced experience to both your employees and end-users.
You can ask for as many product testing and trial sessions as needed before finally rolling out your software to the public.
Final Words
Your custom software development needs to be precise, organized, and timely to have the competitive advantage that you’re aiming for. Since many aspects in software development require specialized skills, you’ll want to work with the best team you can find.
Intelligent Bee’s track record in providing custom software development services is like no other, as we offer software solutions that suit your business needs and resources. Contact us to start your project today!

Working on your own digital product or how to scale an IT company
Digital/online products have been on my mind from a while now and I strongly believe that they are the future of IntelligentBee. Even if we started out as a outsourcing and services company, we developed our own products accordingly to our vision and mission as a company. Our progress turned into establishing our own Product team.
Regarding the opportunities that one can find on our local IT industry, you can find more from the following interview:
How to scale an IT company
Considering the process of technical globalization, more and more software companies are starting to develop online in-house products, leaving the competitors behind. More and more people from online are willing to contribute to this movement, yet the question on everyone’s mind is: What’s next?
We talked to Costi Teleman, CEO at IntelligentBee, a Iasi based IT company, to find out a series of useful insights.
Costi, could you tell us why there is such a dilemma among people with a vast experience in digital?
Generally, their career are built through an ascendant path. They have the possibility of learning, guided by experienced people for specific areas, they follow up a well established hierarchy and enjoy a financial safety and recreational benefits, yet there comes a time when you want to put your fingerprint on a project that implies full responsibility.
That is why, most people of online, from beginners to advanced, choose to be a part of a start-up with a business vision in the long run which includes developing your own digital products rather than be part of a well established company on the market.
What are the professional perspectives they have in this case?
For the ones that reached the highest peak of their career and wish to use their skills to develop a project which will bring a major impact on web tech market, it’s important to know that more and more companies change their business model and develop their own digital products.
What are the advantages in this kind of business?
The advantages are multiple.
First of all, you can bring value to your team through your thinking and your skills. Being responsible for the success of your own product and your own team will highlight the contribution that you bring to the company. It can scare you or it can be the most satisfying moment for the ones that want to share their knowledge and have a progressive thinking.
Also, as a member of the team, you are a pacesetter for IT industry through the developed products. With a reduced execution time, you can deliver exactly what you know, yet you can learn new principles regarding digital products and its consumers.
More than that, you will succeed to establish a series of activities that will help you to leave your fingerprint on digital environment. For that kind of activities you are willing to compromise, to sacrifice a weekend or to add a longer sprint in order to obtain the desired results.
Where you can find teams such as the one described by you?
The most encountered option is leaving the city or even the country, but now, people of online from Iasi and from Moldova in general, can found teams of Product Development in software companies from Iasi and IntelligentBee is one of them. Until now we developed a series of our own products and we wish to offer the chance of stepping up to digital enthusiasts.
Could you tell us more about IntelligentBee?
IntelligentBee is an outsourced software development and technical support company from Iasi. Our aim in our 8 years of activity was to deliver dedicated engineering and technical support teams that will align fast to the business objectives of our customers, becoming an extension of their internal departments.
Besides that, developing of our own digital products has become a core of our mission as a company. We built our own Product department with people that are not willing to “play” it safe, yet they want to be recognized for the developed digital products. The desire of this department is to bring value to the industry.
How would you describe the Product team of IntelligentBee?
First of all, our Product team is formed of people good at their jobs, mastering their know-how, capable to deliver from their first day. We can add up the 4 values that guide our activity, the 4H: Honest, Happy, Humble and Hungry.
The teams from IntelligentBee are formed from people that are open, honest, admit their mistakes, take full responsibility and always offer constructive feedback. They accept every challenge and celebrate every success and have the will to learn more and more.
What are the advantages for the ones interested in Product teams?
- They can develop their coordination abilities.
- Will work with a team that fully understands the technical process of developing a product.
- Will work for a project in which quality is more important than time.
- The possibility of exposing their ideas regarding the development process of the product
- Liberty to take a decision regarding the development process of the product
- Can develop a product that can make a statement on the market
- The possibility of launching new ideas
- They will be part of a company that has both the work and the fun
- They will not work for us, they will work with us for developing our own digital products
In conclusion, what kind of specialists is IntelligentBee looking for its Product team?
I believe that every company who decides to invest in their own products are looking for specialists, not only IntelligentBee. We are looking for people that can execute the products that we want to develop and people that have the know-how for promoting them. Basically, people that are willing to get out of their comfort zone and want to make a statement in the digital market.
Would you work with a compact team for their own digital products against a multinational company? Why?

Golang Guide: A List of Top Golang Frameworks, IDEs & Tools
Golang frameworks
Since its introduction, Google’s Go Programming Language (Golang) has been experiencing an increasing popularity among mainstream users. In a December 2016 survey, 89% of the 3,595 respondents claimed that they program in Go at work or outside of work.
Additionally, Go ranks highest among the programming languages in terms of expertise and preference. This July 2017, Go ranks 10th in Tiobe's Programming Language of the Year, jumping from its 55th ranking last year.
Clearly, Go is attracting many programmers from various disciplines and software development outsourcing professionals. And it’s safe to say that this is due to the ease of using Go.
As a compiled, open-source programming language, Go makes it easy for developers to build simple, reliable, and efficient software. It is the product of the innovation and evolution of the more conservative languages such as C and C++.
With Go, the amount of code typing is reduced and writing robust APIs without sacrificing its performance has become easier. Designed for scalability and concurrency, Go makes optimizations possible. A compiler can perform all the code inspection work before runtime.
We’ve compiled a list of the top frameworks, IDEs, and tools for Golang for your quick reference. Bookmark it on your browser so that you can come back whenever you’re working with Go!
Frameworks for Golang
Web frameworks help developers build applications as easily and quickly as possible. Go is still relatively new, so it’s important to use frameworks with sufficient documentation.
Here are 9 frameworks you can use to help you build projects using the Go Language.
1. Revel
As a high productivity framework for Go, Revel includes a Hot Code Reload tool that lets you rebuild your project on every file change. It also includes a wide variety of comprehensive and high-performance features, so you don’t need to find external libraries to integrate into the framework.

2. Beego
Beego is a full-fledged MVC framework with its own logging library, ORM, and web frameworks. You don’t need to find and install third-party libraries. It features a built-in tool called Bee Tool that watches out for code changes and runs tasks when changes are detected.
Beego will save you a lot of hours, especially in the beginning of a project when you’re figuring out the logging framework or application structure.
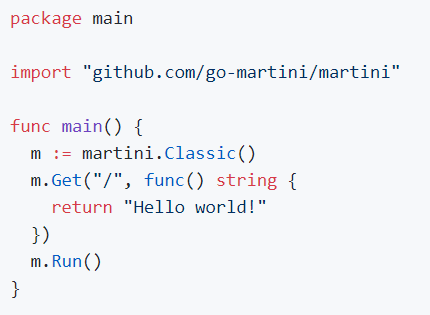
3. Martini
Inspired by Sinatra, Martini is an extremely light but powerful framework. It was developed for writing modular web applications and services in Golang.
It features a non-intrusive design that’s quick and easy to use and includes a wide range of handlers and middleware. It’s capable of performing basic routing, exception handling, and default document serving for AngularJS apps in HTML5 mode.

Martini’s best feature is its use of reflection, which lets developers dynamically insert data into the handler functions and add new services. Martini is also fully compatible with the http.HandlerFunc interface. The downside, though, is that the Martini framework is no longer maintained.
4. Gin Gonic
Gin Gonic is a web framework with a martini-like API, but with much better performance. If you’ve used Martini before, then you’ll be familiar with Gin Gonic. Otherwise, it will only take you 10 minutes to learn Gin. It’s that easy!
Gin Gonic is a minimalistic framework that includes only the most essential libraries and features. This makes it perfect for developing high-performance REST APIs. Plus, it’s 40 times faster than Martini.
You can add middleware, nested groups, JSON validation, and rendering, but it still maintains its optimum performance. Gin Gonic uses httprouter, the fastest HTTP router for Go.

5. Buffalo
Building new web applications with Go is quick and simple with Buffalo. When you’re starting a new project, Buffalo already has everything setup for you—from front-end to back-end development.
It features Hot Reloading, which means that dev command will watch your .go and .html files automatically. It will then rebuild and restart your binary for you. Just run the dev command, and you’ll see the changes go live right before your eyes!
Buffalo is more than just a framework – it’s a holistic web development eco-system that lets you get straight to building your application.
6. Goji
Goji is a lightweight and fast web framework that has composability and simplicity as its main priority. Much like net/http.ServeMux, Goji is a minimalistic HTTP request multiplexer. It includes Einhorn support, which makes it possible for you to have websocket support in Goji.
Additional features include URL patterns, re-configurable middleware stack, graceful shutdown, and more. Goji can be used in production and has served billions of requests across several organizations.

7. Tiger Tonic
Inspired by Dropwizard, Tiger Tonic is a Go framework for developing JSON web services and building high-performance REST APIs. To stay true to the principles of Golang, Tiger Tonic strives to keep features orthogonal.
The downside to Tiger Tonic is its inadequacy when it comes to building large, back-end applications.

8. Gocraft
Another powerful yet minimalistic framework, Gocraft offers fast and scalable routing performance. It adds routing to the net/http package from the standard library.
Gocraft is a Go mux and middleware package that features casting and reflection capabilities so that you can type your code statically. You can also add an optional functionality with the built-in middleware or write your own.
Since performance is always one of the top concerns for developers, Gocraft is a great choice for developers. It’s very easy to write backend web applications using the Gocraft framework.

9. Mango
Although Mango is not actively maintained by its creator, Paul Bellamy, a lot of Go users still use it. The great thing about Mango is its modularity. You can choose from a variety of libraries to include in your project.
Mango lets you build reusable modules of HTTP functionality as quickly and easily as possible. It compiles a list of middleware and application into a single http server object to keep your code self-contained.

Integrated Development Environment (IDEs) for Golang
IDEs for Golang are gaining popularity, along with the Go Language. While many developers still prefer to use text editors, many prefer to use IDEs as well.
If you’re working on a large-scale project with an extensive codebase, an IDE can help you organize your code and navigate it with ease. Furthermore, IDEs can help you test your code and edit them accordingly.
Here are the top IDEs that work great with Golang.
1. Gogland
Software development company JetBrains released another reliable IDE, but this time, for Golang. Gogland is a commercial IDE that provides a robust ergonomic environment for Go developers. It also features coding assistance, debugger, and an integrated terminal.
Because an established company created Gogland, it has an extensive IntelliJ plugin ecosystem where you can get additional tools should you need more.

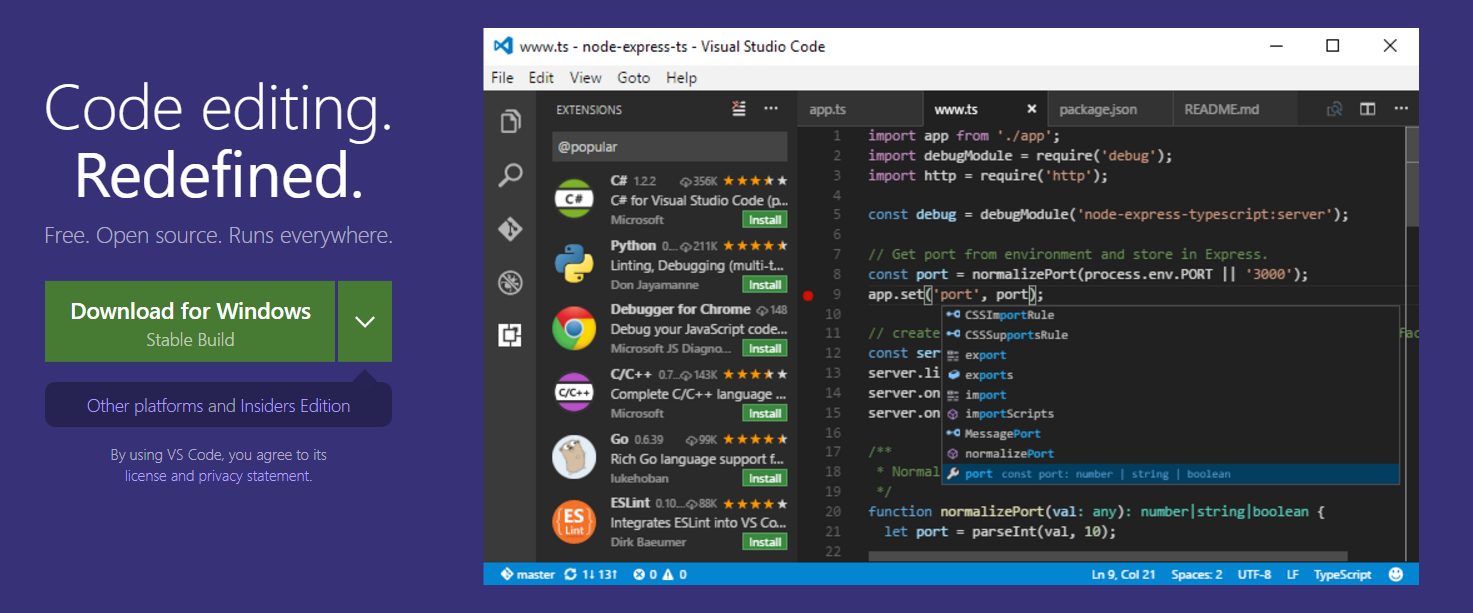
2. Visual Studio Code
Created by Microsoft, Visual Studio Code is a full-featured, open-source IDE and code editor that supports a wide variety of programming languages. It features smart completion with IntelliSense; debugging using break points, call stacks, and an interactive console; built-in Git integration; and hierarchical folder and file explorer.
As another popular IDE, Visual Studio Code has a supportive community of Go developers that regularly contribute. With Visual Studio Code, you can extend functionalities with the array of available plugins.
3. LiteIDE
LiteIDE is among the first Golang-centric, open-source IDEs that was created more than 5 years ago. As a C++ Qt application with a unique look and feel, LiteIDE offers code management, configurable build commands, gdb and Delve debugger, auto-completion and theming with WordApi, MIME type based system, and more. It also provides JSON and Golang support.

4. Wide
Wide is a web-based IDE for Golang programmers. It’s designed for collaborative development and works best for teams and web development agencies. Wide features include code highlight, debugging, Git integration, and more.
Because Wide is created and maintained by a Chinese developer, most of its documentation and support are in Chinese.
5. Atom with go-plus plugin
If you’re already using Atom, your code editing experience in Golang can be improved with an open-source package called go-plus. With go-plus, you get instant, real-time feedback on your syntax and build errors.
The go-plus package offers almost all Golang support in Atom. It can also be used for tools, build flows, linters, vet and coverage tools.
Go-plus also includes various code snippets and features such as autocomplete with gocode, code formatting with gofmt, goreturns, or goimports, and more.
6. Eclipse with GoClipse
Because Eclipse is a widely popular IDE, numerous plugins have been created for it. GoClipse is an Eclipse plugin for Golang that offers Go source code editing with configurable syntax highlighting and automatic indentation and brace completion.
GoClipse also serves as a project wizard and builder that reports syntax and build errors instantly. Additional features of GoClipse include debugging functionality and code assist.

7. Sublime Text with GoSublime
Sublime Text is another sophisticated text editor with a large community of contributors and developers. As such, a wide variety of plugins has been created for this IDE.
GoSublime is a Golang plugin for Sublime Text 3 that offers code completion from Gocode, lint/syntax check while you’re wiring code, automatic addition and removal of package imports, and more.

8. Vim with vim-go plugin
Vim is a free, open-source IDE that can be customized and configured with various plugins. If you’re a Golang programmer, you can use Vim with the vim-go plugin created by Fatih Arslan. Vim-go automatically installs all the necessary binaries for providing a smooth Vim integration for Golang.
Vim-go is a powerful plugin suite for writing and developing Go. Its features include advanced source code analysis, adding and removing import paths, multiple 3rd liner support, goto definition, quick file executions, and much more.
Vim-go is highly customizable, with individual features that can be enabled or disabled according to your need.
9. Komodo
Komodo is a full-featured Go language IDE that supports other programming languages such as Node.js, Python, Ruby, Perl, and more. With this Go IDE, you can write clean code easily. Its features include an advanced code editor, intelligent code completion, syntax checking, version control and unit testing, and a Go Code Intelligence that allows code browsing and code hinting.
The great thing about Komodo is that it works great for team collaboration since multiple developers can edit a document simultaneously. Komodo can be installed on Mac, Windows, or Linux with just one license.

10. IntelliJ IDEA with Go Language (golang.org) Support Plugin
IntelliJ IDEA (same company as JetBrains) is an IDE that can be used with Golang through the Go language support plugin. If you want to use IntelliJ IDEA with Golang, you need to install this plugin, albeit with limited features as opposed to Gogland.

Tools for Golang
Golang tools can be used for a wide variety of projects and web applications. Developers can write code and build applications as quickly and easily as possible with these helpful tools.
Here’s a list of the top Golang tools for your reference.
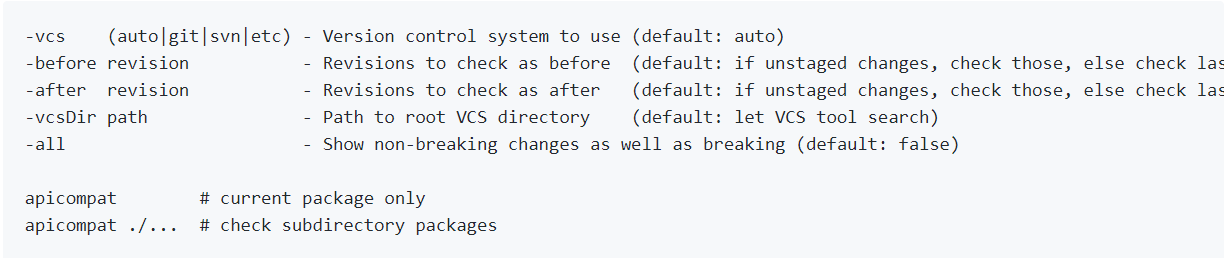
1. Apicompat
Apicompat is a new Go language tool that helps developers detect backwards, incompatible changes and exported declarations.
With Apicompat, you can avoid false positives. However, not every backwards incompatible change can be detected by Apicompat. Swapping argument parameters and other changes still need to be considered by the library author.
2. Checkstyle
Inspired by Java Checkstyle, Checkstyle for Golang prints out coding style suggestions. It also lets developers check file line/function and line/param number, which can then be configured by the user.

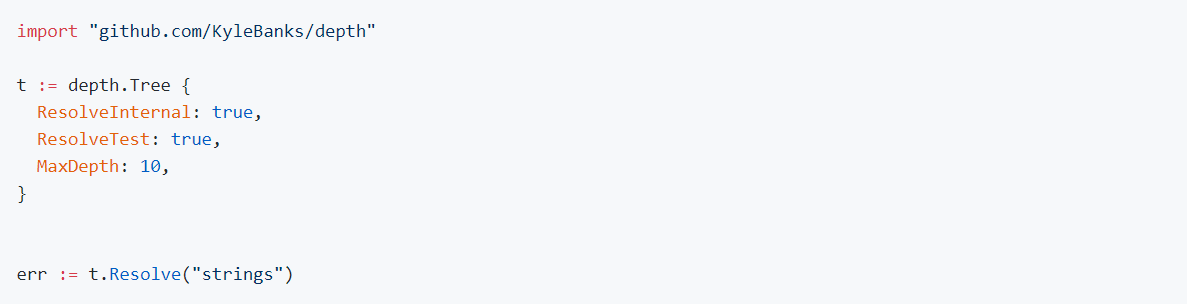
3. Depth
Depth is another useful Golang tool that helps web developers retrieve and visualize Go source code dependency trees. It can be used as a standalone command-line application or as a particular package within your own project. You can add customizations by simply setting the appropriate flags on the Tree before resolving.
4. Go-Swagger
This toolkit includes a wide variety of features and functions. Go-Swagger is an implementation of Swagger 2.0, and can serialize and deserialize swagger specifications. It’s a minimalist yet powerful representation of your RESTful API.
With Go-Swagger, you can swagger spec document, validate against jsonschema, and other extra rules. Other features include code generation, API generation based on swagger specs, spec document generation based on the code, extended string formats, and more.
5. Go Meta Linter
If you need to run Go lint tools and normalize their output concurrently, that’s exactly what Go Meta Linter can do for you. Go Meta Linter is intended to be used with a text editor or an IDE integration such as Sublime Linter plugin, Atom go-plus package, Emacs Flycheck checker, Vim/Neovim, and Go for Visual Studio Code. It also supports a wide variety of linters and configuration files like JSON.

6. Go-callvis
Go-callvis is a web development tool that allows you to visualize the call graph of your Go program with Graphviz's dot format. This tool is especially useful when building large projects with complex codebases. This is also useful when you want to understand another developer’s code structure or rebuild someone else’s project.
With go-callvis, developers can focus specific package within a program; group functions according to package and methods according to type; and limit packages to custom path prefixes, and ignore those that contain them.
7. Gonative
Gonative is a simple Golang tool that lets you build Go toolchains with native libs, which can be cross-compiled while still utilizing the Cgo-enabled versions of the stdlib packages.
Gonative downloads the binary distributions for each platform and copies their libraries into its proper places. At the same time, Gonative sets the correct mod time to avoid unnecessary rebuilds.
Unfortunately, Gonative remains untested on Windows. Additionally, there’s no Linux/arm support provided.

8. Grapes
Grapes is a lightweight Golang tool designed to distribute commands over ssh easily. It’s written and actively maintained by Yaron Sumel.
Grapes will soon support full host key validation, so that’s something developers should watch out for.
9. Gosimple
The great thing about this Golang linter is that it focuses on simplifying Go source code. Gosimple always targets the latest Go version, so it requires Go version 1.6 or later.
If there’s a new Go release, gosimple will suggest the easiest and simplest methods to avoid complicated constructs.

10. Go Vendor
Go Vendor is the Golang tool that works with the standard Vendor folder. It allows developers to copy existing dependencies from $GOPATH with govendor add/update. You can also directly pull new dependencies or update existing dependencies with govendor fetch and move legacy systems with govendor migrate.

Wrapping It Up
If you’re coming from a JS/Node background, you need to learn some new programming concepts such as coroutines, channels, strict typing with compilation, interfaces, structs, pointers, and some other differences. But, once you get into the groove, you’ll find Golang easier and faster to use.

Face Detection with Apple’s iOS 11 Vision Framework
Great stuff is coming from Apple this autumn! Among a lot of new APIs there is the Vision Framework which helps with detection of faces, face features, object tracking and others.
In this post we will take a look at how can one put the face detection to work. We will make a simple application that can take a photo (using the camera of from the library) and will draw some lines on the faces it detects to show you the power of Vision.
Select an Image
I will go fast through this so if you are a really beginner and you find this too hard to follow, please check the my previous iOS related post, Building a Travel Photo Sharing iOS App, first, as it has the same photo selection functionality but explained in greater detail.
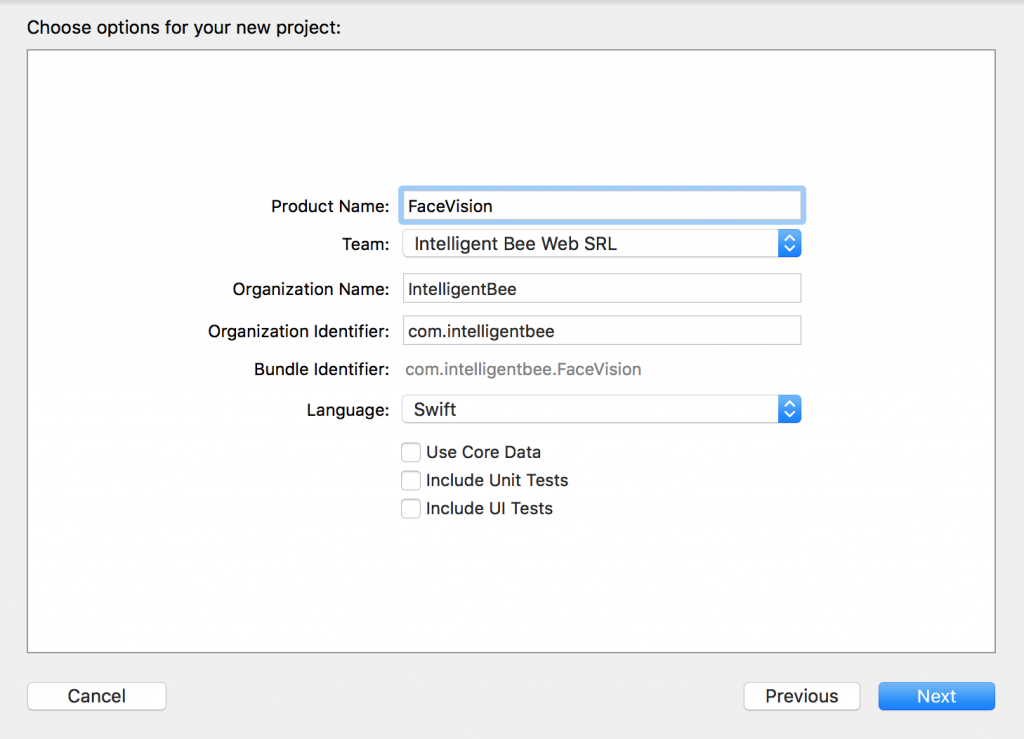
You will need Xcode 9 beta and a device running iOS 11 beta to test this. Let’s start by creating a new Single View App project named FaceVision:
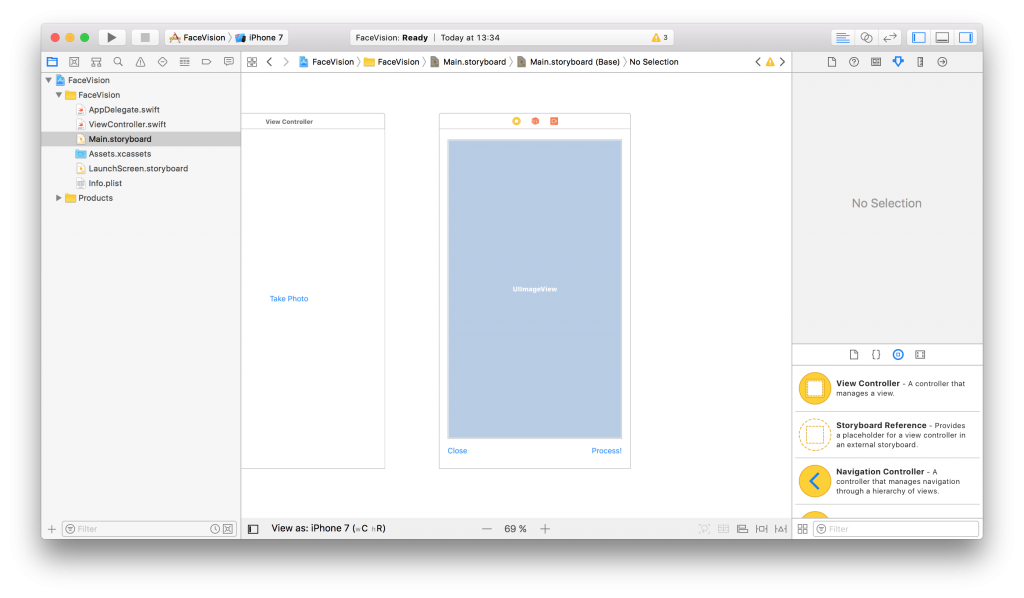
Open the Main.storyboard and drag a button Take Photo to the center of it. Use the constraints to make it stay there :) Create a takePhoto action for it:
@IBAction func takePhoto(_ sender: UIButton) {
    let picker = UIImagePickerController()
    picker.delegate = self
    let alert = UIAlertController(title: nil, message: nil, preferredStyle: .actionSheet)
    if UIImagePickerController.isSourceTypeAvailable(.camera) {
        alert.addAction(UIAlertAction(title: "Camera", style: .default, handler: {action in
            picker.sourceType = .camera
            self.present(picker, animated: true, completion: nil)
        }))
    }
    alert.addAction(UIAlertAction(title: "Photo Library", style: .default, handler: { action in
        picker.sourceType = .photoLibrary
        // on iPad we are required to present this as a popover
        if UIDevice.current.userInterfaceIdiom == .pad {
            picker.modalPresentationStyle = .popover
            picker.popoverPresentationController?.sourceView = self.view
            picker.popoverPresentationController?.sourceRect = self.takePhotoButton.frame
        }
        self.present(picker, animated: true, completion: nil)
    }))
    alert.addAction(UIAlertAction(title: "Cancel", style: .cancel, handler: nil))
    // on iPad this is a popover
    alert.popoverPresentationController?.sourceView = self.view
    alert.popoverPresentationController?.sourceRect = takePhotoButton.frame
    self.present(alert, animated: true, completion: nil)
}
Here we used an UIImagePickerController to get an image so we have to make our ViewController implement the UIImagePickerControllerDelegate and UINavigationControllerDelegate protocols:
class ViewController: UIViewController, UIImagePickerControllerDelegate, UINavigationControllerDelegate {We also need an outlet for the button:
@IBOutlet weak var takePhotoButton: UIButton!
And an image var:
var image: UIImage!
We also need to add the following in the Info.plist to be able to access the camera and the photo library:
Privacy - Camera Usage Description: Access to the camera is needed in order to be able to take a photo to be analyzed by the appPrivacy - Photo Library Usage Description: Access to the photo library is needed in order to be able to choose a photo to be analyzed by the app
After the users chooses an image we will use another view controller to show it and to let the user start the processing or go back to the first screen. Add a new View Controller in the Main.storyboard. In it, add an Image View with an Aspect Fit Content Mode and two buttons like in the image below (don’t forget to use the necessary constraints):
Now, create a new UIViewController class named ImageViewControler.swift and set it to be the class of the new View Controller you just added in the Main.storyboard:
import UIKit

class ImageViewController: UIViewController {

    override func viewDidLoad() {
        super.viewDidLoad()

        // Do any additional setup after loading the view.
    }
}
Still in the Main.storyboard, create a Present Modally kind segue between the two view controllers with the showImageSegue identifier:

Also add an outlet for the Image View and a new property to hold the image from the user:
@IBOutlet weak var imageView: UIImageView!

var image: UIImage!
Now, back to our initial ViewController class, we need to present the new ImageViewController and set the selected image:
func imagePickerController(_ picker: UIImagePickerController, didFinishPickingMediaWithInfo info: [String : Any]) {
    dismiss(animated: true, completion: nil)
    image = info[UIImagePickerControllerOriginalImage] as! UIImage
    performSegue(withIdentifier: "showImageSegue", sender: self)
}

override func prepare(for segue: UIStoryboardSegue, sender: Any?) {
    if segue.identifier == "showImageSegue" {
        if let imageViewController = segue.destination as? ImageViewController {
            imageViewController.image = self.image
        }
    }
}
We also need an exit method to be called when we press the Close button from the Image View Controller:
@IBAction func exit(unwindSegue: UIStoryboardSegue) {
    image = nil
}
To make this work, head back to the Main.storyboard and Ctrl+drag from the Close button to the exit icon of the Image View Controller and select the exit method from the popup.
To actually show the selected image to the user we have to set it to the imageView:
override func viewDidLoad() {
    super.viewDidLoad()

    // Do any additional setup after loading the view.
    imageView.image = image
}
If you run the app now you should be able to select a photo either from the camera or from the library and it will be presented to you in the second view controller with the Close and Process! buttons below it.
![]()
Detect Face Features
It’s time to get to the fun part, detect the faces and faces features in the image.
Create a new process action for the Process! button with the following content:
@IBAction func process(_ sender: UIButton) {
    var orientation:Int32 = 0

    // detect image orientation, we need it to be accurate for the face detection to work
    switch image.imageOrientation {
    case .up:
        orientation = 1
    case .right:
        orientation = 6
    case .down:
        orientation = 3
    case .left:
        orientation = 8
    default:
        orientation = 1
    }

    // vision
    let faceLandmarksRequest = VNDetectFaceLandmarksRequest(completionHandler: self.handleFaceFeatures)
    let requestHandler = VNImageRequestHandler(cgImage: image.cgImage!, orientation: orientation ,options: [:])
    do {
        try requestHandler.perform([faceLandmarksRequest])
    } catch {
        print(error)
    }
}
After translating the image orientation from UIImageOrientationx values to kCGImagePropertyOrientation values (not sure why Apple didn’t make them the same), the code will start the detection process from the Vision framework. Don’t forget to import Vision to have access to it’s API.
We’ll add now the method that will be called when the Vision’s processing is done:
func handleFaceFeatures(request: VNRequest, errror: Error?) {
    guard let observations = request.results as? [VNFaceObservation] else {
        fatalError("unexpected result type!")
    }

    for face in observations {
        addFaceLandmarksToImage(face)
    }
}
This also calls yet another method that does the actual drawing on the image based on the data received from the detect face landmarks request:
func addFaceLandmarksToImage(_ face: VNFaceObservation) {
    UIGraphicsBeginImageContextWithOptions(image.size, true, 0.0)
    let context = UIGraphicsGetCurrentContext()

    // draw the image
    image.draw(in: CGRect(x: 0, y: 0, width: image.size.width, height: image.size.height))

    context?.translateBy(x: 0, y: image.size.height)
    context?.scaleBy(x: 1.0, y: -1.0)

    // draw the face rect
    let w = face.boundingBox.size.width * image.size.width
    let h = face.boundingBox.size.height * image.size.height
    let x = face.boundingBox.origin.x * image.size.width
    let y = face.boundingBox.origin.y * image.size.height
    let faceRect = CGRect(x: x, y: y, width: w, height: h)
    context?.saveGState()
    context?.setStrokeColor(UIColor.red.cgColor)
    context?.setLineWidth(8.0)
    context?.addRect(faceRect)
    context?.drawPath(using: .stroke)
    context?.restoreGState()

    // face contour
    context?.saveGState()
    context?.setStrokeColor(UIColor.yellow.cgColor)
    if let landmark = face.landmarks?.faceContour {
        for i in 0...landmark.pointCount - 1 { // last point is 0,0
            let point = landmark.point(at: i)
            if i == 0 {
                context?.move(to: CGPoint(x: x + CGFloat(point.x) * w, y: y + CGFloat(point.y) * h))
            } else {
                context?.addLine(to: CGPoint(x: x + CGFloat(point.x) * w, y: y + CGFloat(point.y) * h))
            }
        }
    }
    context?.setLineWidth(8.0)
    context?.drawPath(using: .stroke)
    context?.saveGState()

    // outer lips
    context?.saveGState()
    context?.setStrokeColor(UIColor.yellow.cgColor)
    if let landmark = face.landmarks?.outerLips {
        for i in 0...landmark.pointCount - 1 { // last point is 0,0
            let point = landmark.point(at: i)
            if i == 0 {
                context?.move(to: CGPoint(x: x + CGFloat(point.x) * w, y: y + CGFloat(point.y) * h))
            } else {
                context?.addLine(to: CGPoint(x: x + CGFloat(point.x) * w, y: y + CGFloat(point.y) * h))
            }
        }
    }
    context?.closePath()
    context?.setLineWidth(8.0)
    context?.drawPath(using: .stroke)
    context?.saveGState()

    // inner lips
    context?.saveGState()
    context?.setStrokeColor(UIColor.yellow.cgColor)
    if let landmark = face.landmarks?.innerLips {
        for i in 0...landmark.pointCount - 1 { // last point is 0,0
            let point = landmark.point(at: i)
            if i == 0 {
                context?.move(to: CGPoint(x: x + CGFloat(point.x) * w, y: y + CGFloat(point.y) * h))
            } else {
                context?.addLine(to: CGPoint(x: x + CGFloat(point.x) * w, y: y + CGFloat(point.y) * h))
            }
        }
    }
    context?.closePath()
    context?.setLineWidth(8.0)
    context?.drawPath(using: .stroke)
    context?.saveGState()

    // left eye
    context?.saveGState()
    context?.setStrokeColor(UIColor.yellow.cgColor)
    if let landmark = face.landmarks?.leftEye {
        for i in 0...landmark.pointCount - 1 { // last point is 0,0
            let point = landmark.point(at: i)
            if i == 0 {
                context?.move(to: CGPoint(x: x + CGFloat(point.x) * w, y: y + CGFloat(point.y) * h))
            } else {
                context?.addLine(to: CGPoint(x: x + CGFloat(point.x) * w, y: y + CGFloat(point.y) * h))
            }
        }
    }
    context?.closePath()
    context?.setLineWidth(8.0)
    context?.drawPath(using: .stroke)
    context?.saveGState()

    // right eye
    context?.saveGState()
    context?.setStrokeColor(UIColor.yellow.cgColor)
    if let landmark = face.landmarks?.rightEye {
        for i in 0...landmark.pointCount - 1 { // last point is 0,0
            let point = landmark.point(at: i)
            if i == 0 {
                context?.move(to: CGPoint(x: x + CGFloat(point.x) * w, y: y + CGFloat(point.y) * h))
            } else {
                context?.addLine(to: CGPoint(x: x + CGFloat(point.x) * w, y: y + CGFloat(point.y) * h))
            }
        }
    }
    context?.closePath()
    context?.setLineWidth(8.0)
    context?.drawPath(using: .stroke)
    context?.saveGState()

    // left pupil
    context?.saveGState()
    context?.setStrokeColor(UIColor.yellow.cgColor)
    if let landmark = face.landmarks?.leftPupil {
        for i in 0...landmark.pointCount - 1 { // last point is 0,0
            let point = landmark.point(at: i)
            if i == 0 {
                context?.move(to: CGPoint(x: x + CGFloat(point.x) * w, y: y + CGFloat(point.y) * h))
            } else {
                context?.addLine(to: CGPoint(x: x + CGFloat(point.x) * w, y: y + CGFloat(point.y) * h))
            }
        }
    }
    context?.closePath()
    context?.setLineWidth(8.0)
    context?.drawPath(using: .stroke)
    context?.saveGState()

    // right pupil
    context?.saveGState()
    context?.setStrokeColor(UIColor.yellow.cgColor)
    if let landmark = face.landmarks?.rightPupil {
        for i in 0...landmark.pointCount - 1 { // last point is 0,0
            let point = landmark.point(at: i)
            if i == 0 {
                context?.move(to: CGPoint(x: x + CGFloat(point.x) * w, y: y + CGFloat(point.y) * h))
            } else {
                context?.addLine(to: CGPoint(x: x + CGFloat(point.x) * w, y: y + CGFloat(point.y) * h))
            }
        }
    }
    context?.closePath()
    context?.setLineWidth(8.0)
    context?.drawPath(using: .stroke)
    context?.saveGState()

    // left eyebrow
    context?.saveGState()
    context?.setStrokeColor(UIColor.yellow.cgColor)
    if let landmark = face.landmarks?.leftEyebrow {
        for i in 0...landmark.pointCount - 1 { // last point is 0,0
            let point = landmark.point(at: i)
            if i == 0 {
                context?.move(to: CGPoint(x: x + CGFloat(point.x) * w, y: y + CGFloat(point.y) * h))
            } else {
                context?.addLine(to: CGPoint(x: x + CGFloat(point.x) * w, y: y + CGFloat(point.y) * h))
            }
        }
    }
    context?.setLineWidth(8.0)
    context?.drawPath(using: .stroke)
    context?.saveGState()

    // right eyebrow
    context?.saveGState()
    context?.setStrokeColor(UIColor.yellow.cgColor)
    if let landmark = face.landmarks?.rightEyebrow {
        for i in 0...landmark.pointCount - 1 { // last point is 0,0
            let point = landmark.point(at: i)
            if i == 0 {
                context?.move(to: CGPoint(x: x + CGFloat(point.x) * w, y: y + CGFloat(point.y) * h))
            } else {
                context?.addLine(to: CGPoint(x: x + CGFloat(point.x) * w, y: y + CGFloat(point.y) * h))
            }
        }
    }
    context?.setLineWidth(8.0)
    context?.drawPath(using: .stroke)
    context?.saveGState()

    // nose
    context?.saveGState()
    context?.setStrokeColor(UIColor.yellow.cgColor)
    if let landmark = face.landmarks?.nose {
        for i in 0...landmark.pointCount - 1 { // last point is 0,0
            let point = landmark.point(at: i)
            if i == 0 {
                context?.move(to: CGPoint(x: x + CGFloat(point.x) * w, y: y + CGFloat(point.y) * h))
            } else {
                context?.addLine(to: CGPoint(x: x + CGFloat(point.x) * w, y: y + CGFloat(point.y) * h))
            }
        }
    }
    context?.closePath()
    context?.setLineWidth(8.0)
    context?.drawPath(using: .stroke)
    context?.saveGState()

    // nose crest
    context?.saveGState()
    context?.setStrokeColor(UIColor.yellow.cgColor)
    if let landmark = face.landmarks?.noseCrest {
        for i in 0...landmark.pointCount - 1 { // last point is 0,0
            let point = landmark.point(at: i)
            if i == 0 {
                context?.move(to: CGPoint(x: x + CGFloat(point.x) * w, y: y + CGFloat(point.y) * h))
            } else {
                context?.addLine(to: CGPoint(x: x + CGFloat(point.x) * w, y: y + CGFloat(point.y) * h))
            }
        }
    }
    context?.setLineWidth(8.0)
    context?.drawPath(using: .stroke)
    context?.saveGState()

    // median line
    context?.saveGState()
    context?.setStrokeColor(UIColor.yellow.cgColor)
    if let landmark = face.landmarks?.medianLine {
        for i in 0...landmark.pointCount - 1 { // last point is 0,0
            let point = landmark.point(at: i)
            if i == 0 {
                context?.move(to: CGPoint(x: x + CGFloat(point.x) * w, y: y + CGFloat(point.y) * h))
            } else {
                context?.addLine(to: CGPoint(x: x + CGFloat(point.x) * w, y: y + CGFloat(point.y) * h))
            }
        }
    }
    context?.setLineWidth(8.0)
    context?.drawPath(using: .stroke)
    context?.saveGState()

    // get the final image
    let finalImage = UIGraphicsGetImageFromCurrentImageContext()

    // end drawing context
    UIGraphicsEndImageContext()

    imageView.image = finalImage
}
As you can see we have quite a lot of features that Vision is able to identify: the face contour, the mouth (both inner and outer lips), the eyes together with the pupils and eyebrows, the nose and the nose crest and, finally, the median line of the faces.
You can now run the app and take some unusual selfies of yourself. Here’s mine:
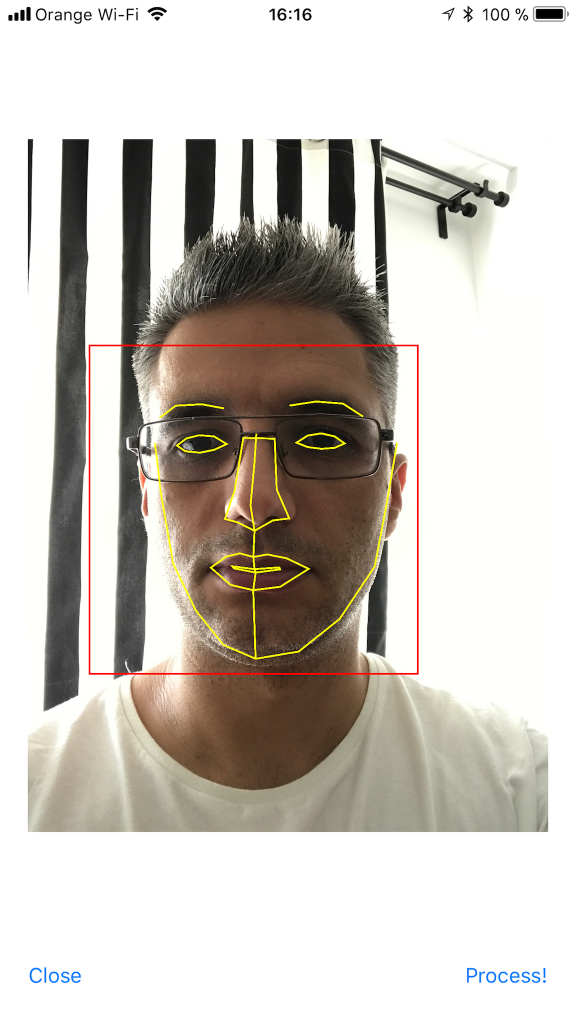
I hope you enjoyed this, please let me know in the comments how did it go and if there are things that can be improved. Also, some pictures taken with the app wouldn’t hurt at all :)
You can get the code from here: https://github.com/intelligentbee/FaceVision
Thanks!

Building a Travel Photo Sharing iOS App
Hello! I want to show you how to build a relative simple photo sharing app with a twist: your images will be placed on a map background of your current location. You will also be able to add a short message and your name, to end up with an image looking like this (so you can brag to your friends with what you visited in the awesome vacation you have):

To follow this tutorial you need an Apple computer with xCode installed and an Apple developer account.
Create the Project
Open xCode and create a new project named PicTravel. Choose the Single View Application template:
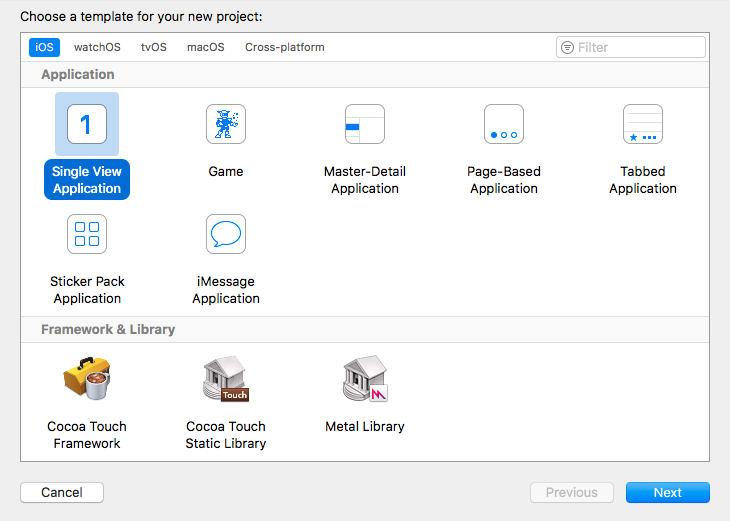
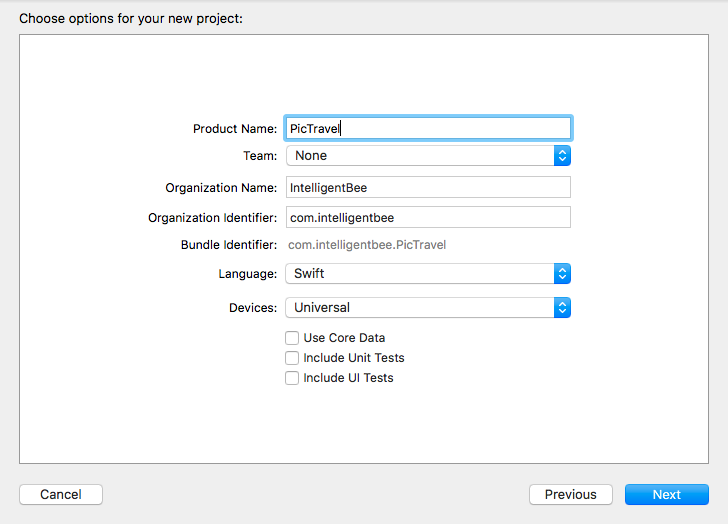
Give the project a name, we chose PicTravel but you ca choose what other name you like. Also fill in the organization name and the organization identifier for your project:
The last step is to save the newly created project in your Developer folder.
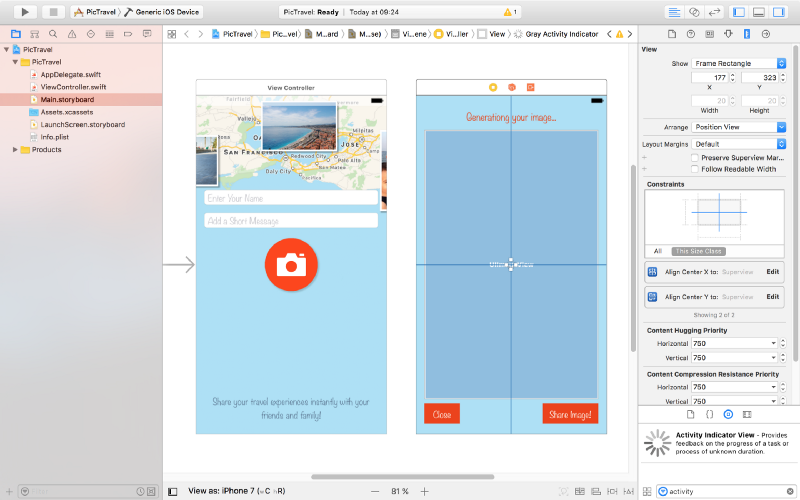
Building the Interface
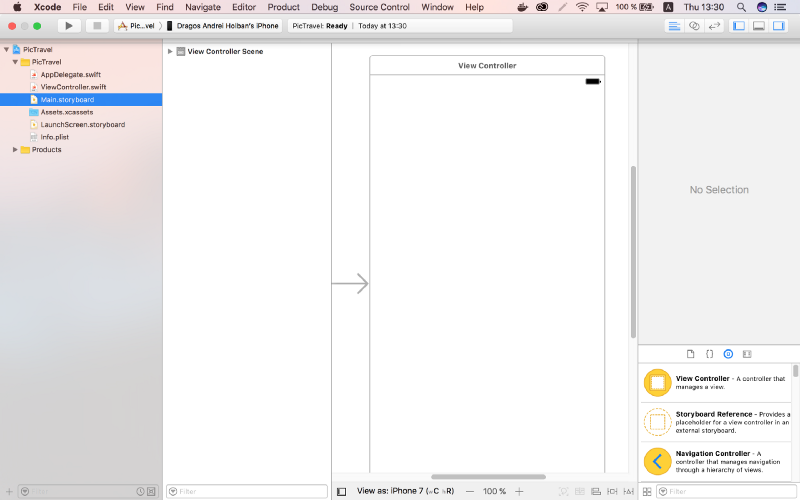
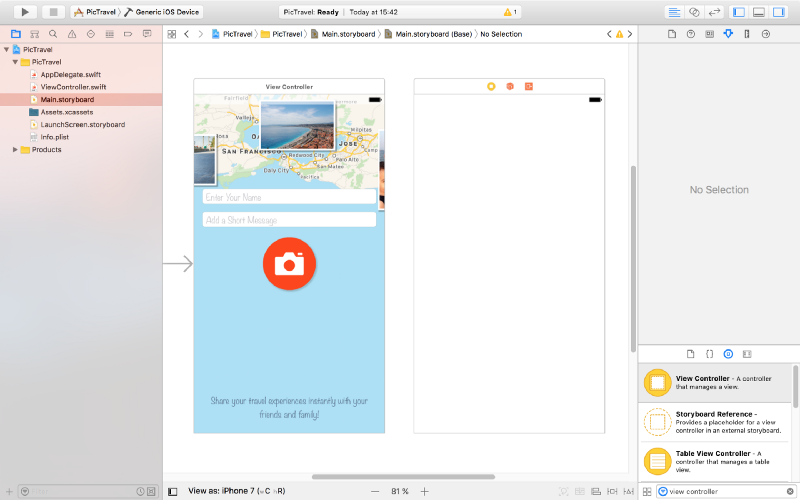
From the left panel, open the Main.storyboard. This is where we will build our app interface.
From the right panel, the bottom part, drag an ImageView and place it in the center of the scene. Resize it so it covers everything (snap it to the blue lines that appear).
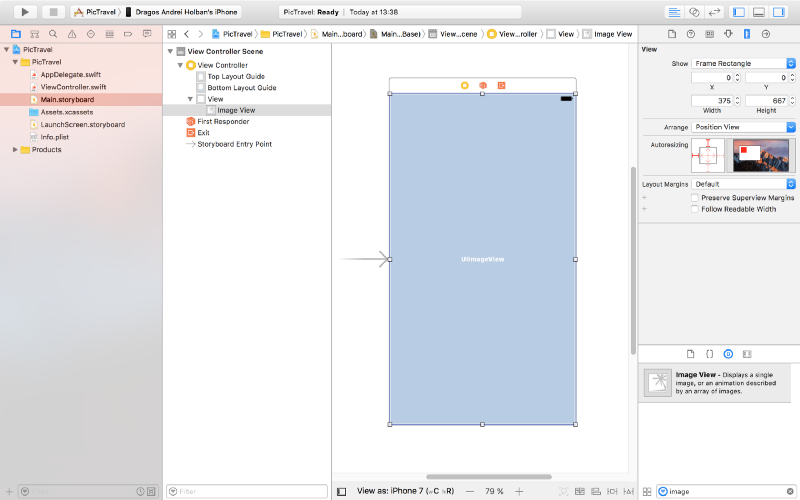
Pin the ImageView to the scene margins using the constraints dialog like you see in the image below:
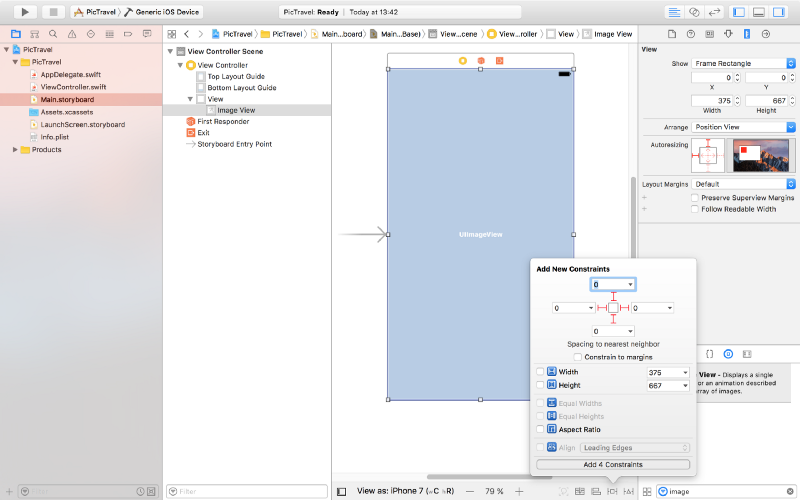
We will use this to put a background image for our app’s main screen. Download the background image from here then open the Assets.xcassets item from the left panel, click on the “+” button from the bottom and add a new image set named Background.
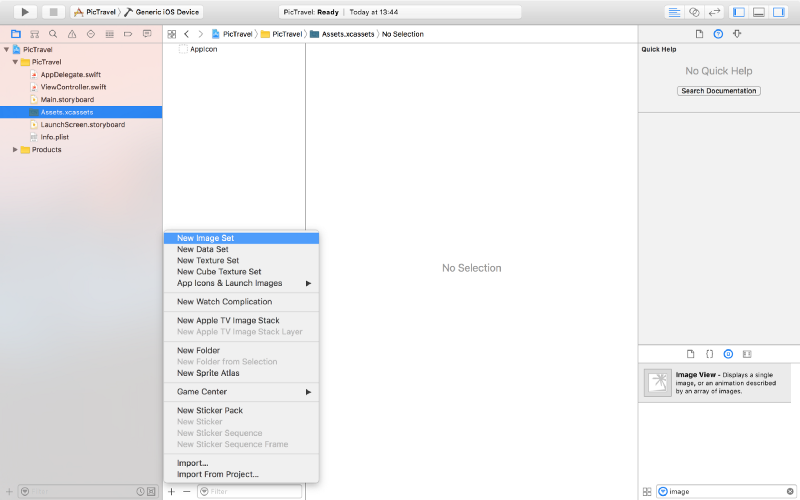
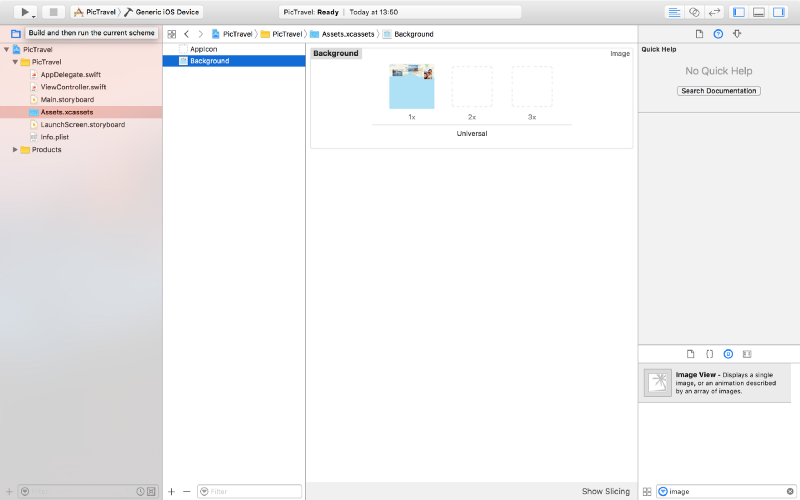
Drag the downloaded image to the “1x” placeholder to end up with something like this (we will not use the “2x” and “3x” placeholder for this tutorial, but you can add bigger resolution images to it if you want).
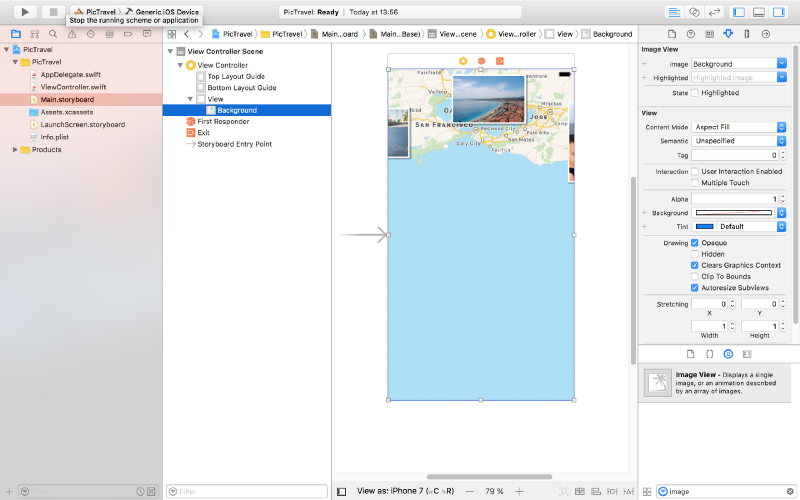
Now, back to the Main.storyboard, select the ImageView and, from the Attributes Inspector, select the Background image and set the Content Mode to Aspect Fill.
It’s time to add a new image to our assets that we will use for the take a photo button we are about to add. Download the image from here, create a new Image Set named Button in the Assets.xcassets and drag the image into the 1x placeholder like we did earlier with the background.
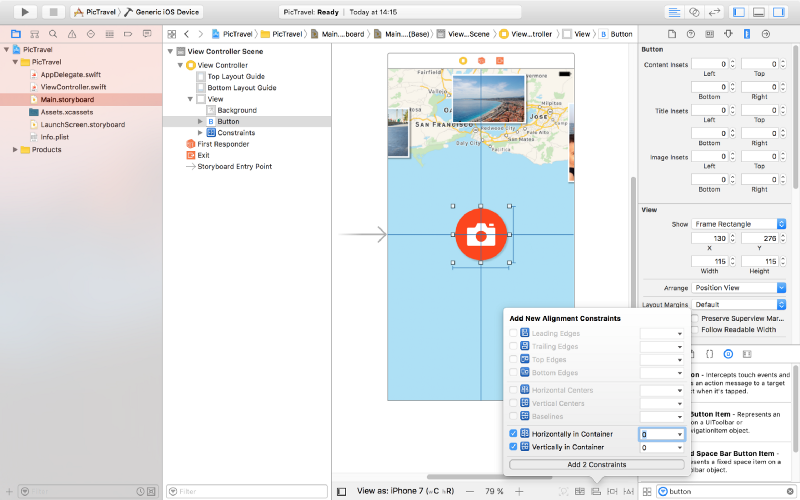
Next, in the Main.storybord, drag a button to the center of the scene. Set it’s Type to Custom, clear the Title and set the Background to the Button image we just created. From the Size Inspector, set the button with and height to 115.
Add two new constraints for the button’s with and heigh (115 each), then, from the Alignment Constriants, align the button horizontally and vertically in the container.
Now let’s add two text fields for the user’s name and message. Place them like in the image below, with the constraints listed below. Don’t forget the blue guides that make the placement easier for you. To create constrains between two elements you can Ctrl+drag from one to another and select the type of constraint you want from the popup that appears.
For the message text field:
- Top Space to the name text field:
15 - Bottom Space to the button:
15 - Width <=
500 - Align Center X to superview
- Trailing Space to superview:
0with a Priority of900- that’s very important as it will keep the text field pinned to the margin on iPhones but on bigger devices the width constraint will be stronger so it will not grow larger than 500. - Leading Space to superview:
0with a Priority of900
For the name field:
- Bottom Space to the message text field:
15 - Width <=
500 - Align Center X to superview
- Trailing Space to superview:
0with a Priority of900 - Leading Space to superview:
0with a Priority of900
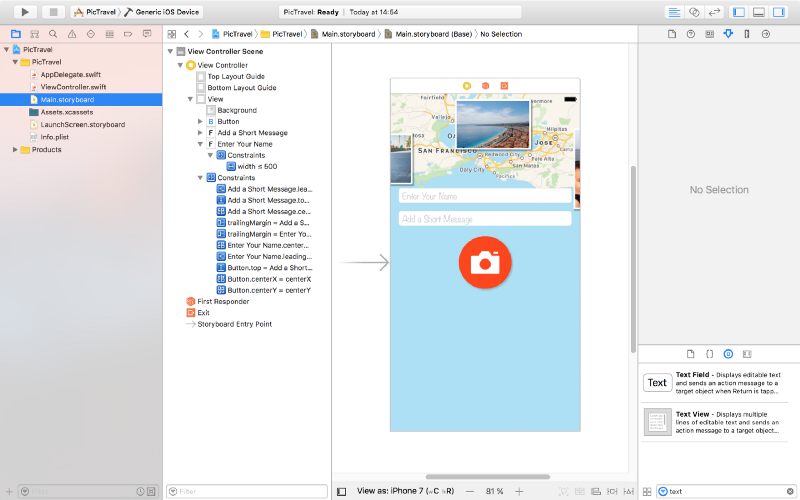
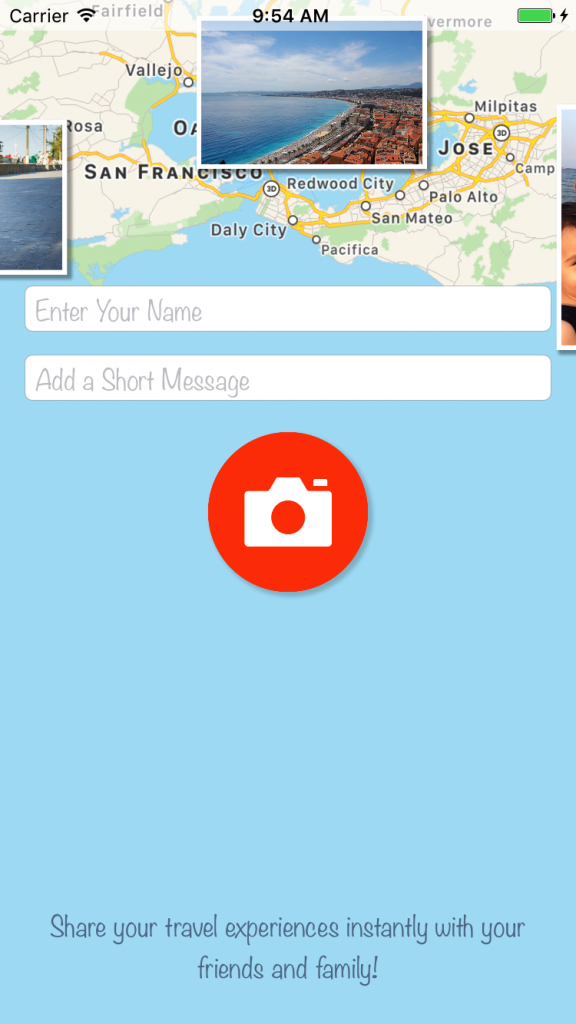
Set the placeholders for each of the text fields to “Enter Your Name” and “Add a Short Message” so the user knows what to do. Set the Font to Noteworthy Light with a size of 17 for both.
Also, for the name field set the Capitalization to Words, Correction and SpellChecking, both to No. For the message field set the Capitalization to Sentences.
Here’s the result:
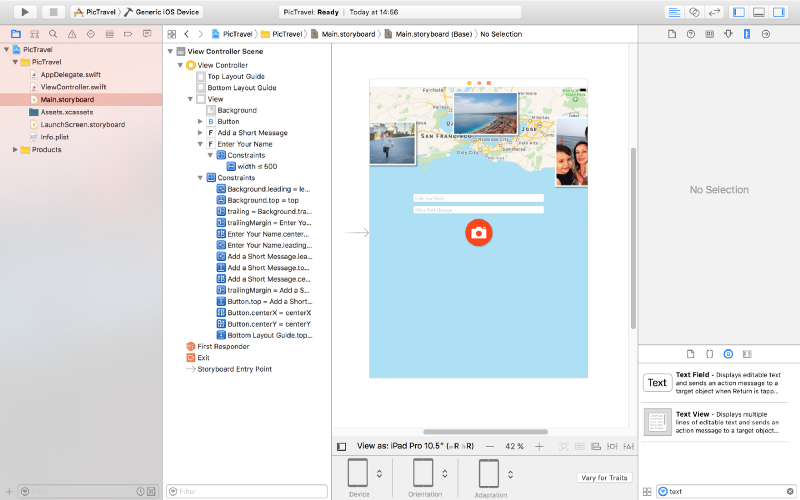
And here’s how it looks on an iPad (you can use the bottom bar under the scene to select on what device you want to preview the interface):
There are two more small elements to add and our main screen will be finished.
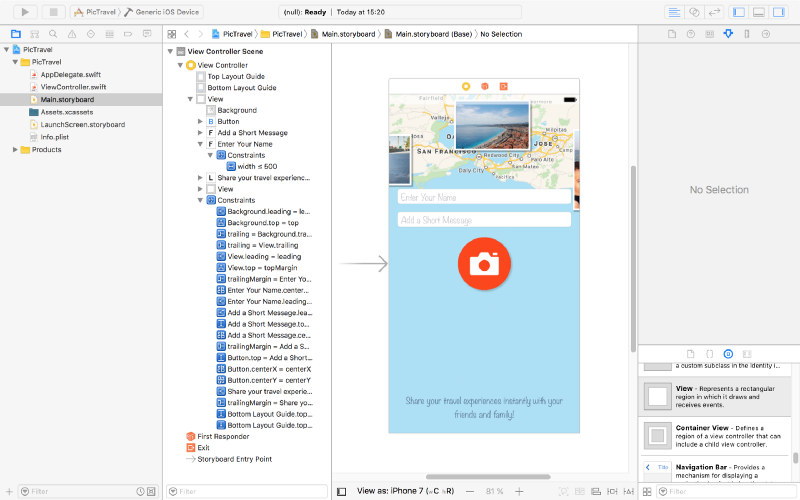
Add a label at the bottom with the following text: “Share your travel experiences instantly with your friends & family!”. Set it’s Font to Noteworthly Light 17, Alignment to center, Color to #5E7A96 and Lines to 0. Use the following constrains:
- Trailing Space to superview’s margins:
0 - Leading Space to superview’s margins:
0 - Bottom Space to Bottom Layout:
20 - Height:
64
Finally, add a new view at the top, having a white background with a opacity of 60%. Constrains used are:
- Trailing Space to superview:
0 - Leading Space to superview:
0 - Bottom Space to Top Layout:
20 - Height:
20
Here is the final design:
We will use this screen to get the user’s name and message and open the camera or photo library to take a photo. But after we gel all we need from the user, we need a new screen to show the final image and let him share it. So let’s add a new screen to our app.
From the Object Library, drag a new View Controller near the first one:
Set the background for the view of this new View Controller to #ACE0F6.
Next, add two buttons like in the image below. Type is custom, background color is #EE4205, font Noteworthy Light 17. Height 40, width 70 and 110. They are pinned to the bottom layout + 20, left or right of the container and also have constraints on with and height.
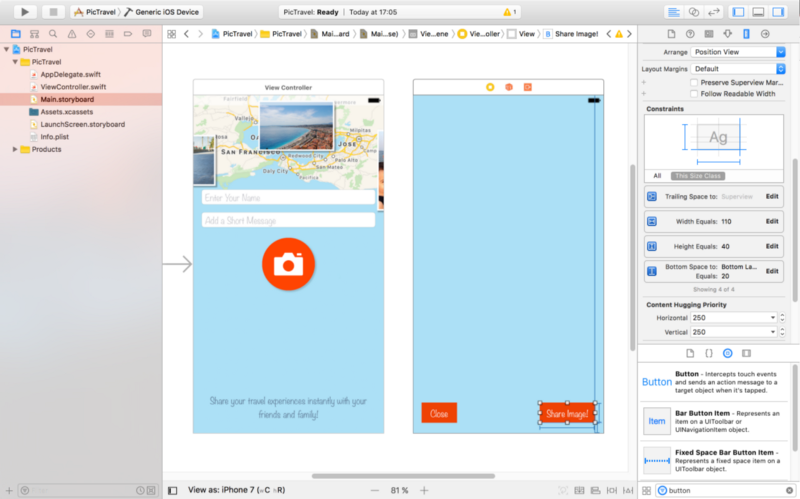
At the top, add a label to show the current status of the app to the user. Pin it to the top, left and right margins using constrains with a height of 40. Set the font to Noteworthy Light 19 and color to #EE4205. The initial text will be “Generating your image…” center aligned.
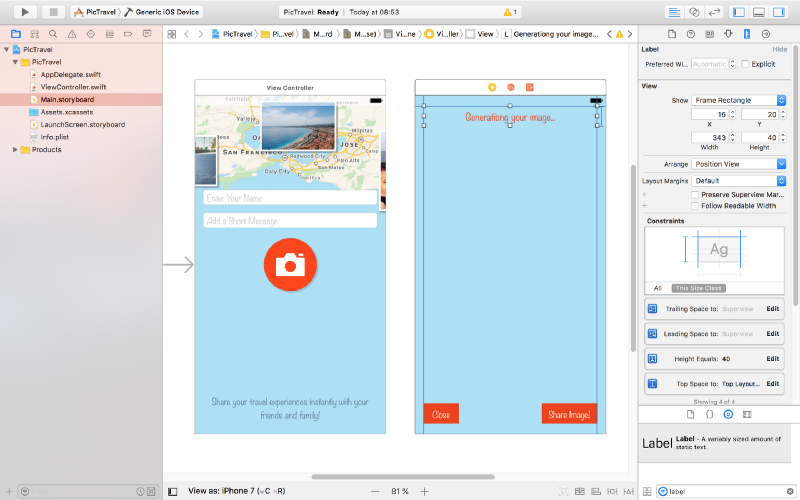
To show the generated image we need an Image View. Drag it to the center of the second screen and create the following constraints for it:
- Top Space to “Generating your image…” label:
8 - Bottom Space to “Share Image!” button:
8 - Leading Space to superview margin:
0 - Trailing Space to superview margin:
0
Also set it’s Content Mode to Aspect Fit
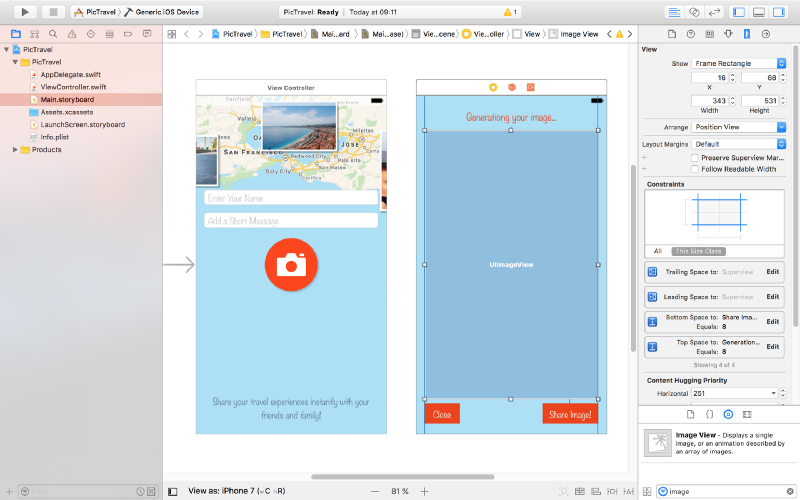
The last piece of the puzzle is an Activity Indicator View that we will use to visually inform the user that something happens behind the scenes (final image generation) and he has to wait for a few seconds.
Drag it from the Object Library and place it in the middle of the screen. Add constraints to center it horizontally and vertically in the container and set its Behavior to Animating and Hides When Stopped.
That’s it, our app’s interface is done. Run the app in the simulator to see how it looks.
Now it’s time to write some code.
Taking a Photo
With the main.storyboard still open, select the button from the first screen then open the Assistant editor and be sure you have the ViewController.swit file open on the right side. Use the manual mode if you have in case the Assistant editor has a problem figuring this out.
Now, Ctrl+drag from the button to the code to create a new action (be sure to select Action as the Connection , set the Name to selectPhotoClicked and the Type to UIButton):
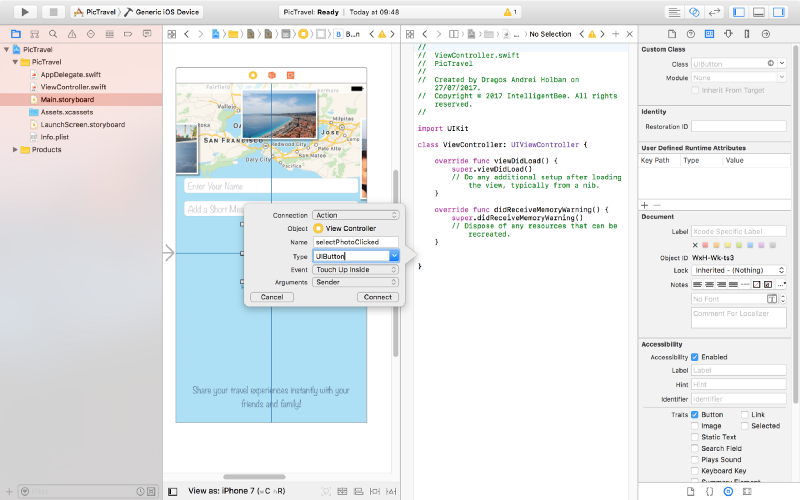
@IBAction func selectPhotoClicked(_ sender: UIButton) {

}
Also Ctrl+drag from the two text fields and the button to the code and create three outlets:
@IBOutlet weak var name: UITextField!
@IBOutlet weak var message: UITextField!
@IBOutlet weak var selectPhotoButton: UIButton!
Now let’s start with the most interesting part, choosing a photo. The user will be given a choice to take a photo using the camera or to choose one from the photo library. For this we will use an action sheet.
Edit the selectPhotoClicked method to add the code for this:
@IBAction func selectPhotoClicked(_ sender: UIButton) {
    let picker = UIImagePickerController()
    picker.delegate = self
    let alert = UIAlertController(title: nil, message: nil, preferredStyle: .actionSheet)
    alert.addAction(UIAlertAction(title: "Camera", style: .default, handler: {action in
        picker.sourceType = .camera
        self.present(picker, animated: true, completion: nil)
    }))
    alert.addAction(UIAlertAction(title: "Photo Library", style: .default, handler: { action in
        picker.sourceType = .photoLibrary
        self.present(picker, animated: true, completion: nil)
    }))
    alert.addAction(UIAlertAction(title: "Cancel", style: .cancel, handler: nil))
    self.present(alert, animated: true, completion: nil)
}
To make this code work we need to make our ViewController a delegate for both UIImagePickerControllerDelegate and UINavigationControllerDelegate. To do this change the line defining the ViewController class to the following:
class ViewController: UIViewController, UIImagePickerControllerDelegate, UINavigationControllerDelegate {If you test now the app will crash with an error like “This app has crashed because it attempted to access privacy-sensitive data without a usage description…”. That’s because the app has to ask the user’s permission to access the photo library or the camera and we have to provide a reason for this, reason that will be presented to the user. To do this open the Info.plist file and add a two new items:
Privacy - Photo Library Usage Descriptionwith a string value ofAccess to the photo library is needed in order to be able to choose a photo to be shared by the app.Privacy - Camera Usage Descriptionwith a string value ofAccess to the camera is needed in order to be able to take a photo to be shared by the app.
Also, if you try to choose the “camera” option in the simulator, the app will crash again because the simulator has no camera (“Source type 1 not available”). We need to add a test for this and only present the option if the camera is available:
if UIImagePickerController.isSourceTypeAvailable(.camera) {
    alert.addAction(UIAlertAction(title: "Camera", style: .default, handler: {action in
        picker.sourceType = .camera
        self.present(picker, animated: true, completion: nil)
    }))
}
One more thing to fix before we start handling the actual images: try to run the app on an iPad (in the simulator or on a real device). The app crashes one more time :(
Your application has presented a UIAlertController of style UIAlertControllerStyleActionSheet. The modalPresentationStyle of a UIAlertController with this style is UIModalPresentationPopover. You must provide location information for this popover through the alert controller’s popoverPresentationController. You must provide either a sourceView and sourceRect or a barButtonItem. If this information is not known when you present the alert controller, you may provide it in the UIPopoverPresentationControllerDelegate method -prepareForPopoverPresentation.
That’s because the UIAlertController on an iPad is presented like a popover (UIModalPresentationPopover) and it needs a position to be shown at. To do this we will have to test if we have a popoverPresentationController in the alert and, if true, set it’s sourceView and sourceRect (we are using an Swift optional for this, as the code after the question mark will be executed only if the popoverPresentationController is not nil):
alert.addAction(UIAlertAction(title: "Cancel", style: .cancel, handler: nil))
// on iPad this is a popover
alert.popoverPresentationController?.sourceView = self.view
alert.popoverPresentationController?.sourceRect = selectPhotoButton.frame
self.present(alert, animated: true, completion: nil)
We also need to make the photo selection from the library to be shown as a popover on an iPad:
alert.addAction(UIAlertAction(title: "Photo Library", style: .default, handler: { action in
    picker.sourceType = .photoLibrary
    // on iPad we are required to present this as a popover
    if UIDevice.current.userInterfaceIdiom == .pad {
        picker.modalPresentationStyle = .popover
        picker.popoverPresentationController?.sourceView = self.view
        picker.popoverPresentationController?.sourceRect = self.selectPhotoButton.frame
    }
    self.present(picker, animated: true, completion: nil)
}))
Now everything should be fine. Let’s see how to handle the image the user chooses.
We already added a View Controller in the Main.storyboard to show the final image to the user but we need an associated view controller class for it so we have a place to write the code involved in the process.
From the File menu select New -> File… then choose the Cocoa Touch Class option and click Next. Name the new class ShareViewController and be sure to set it as a subclass of UIViewController, no XIB, Swift language.
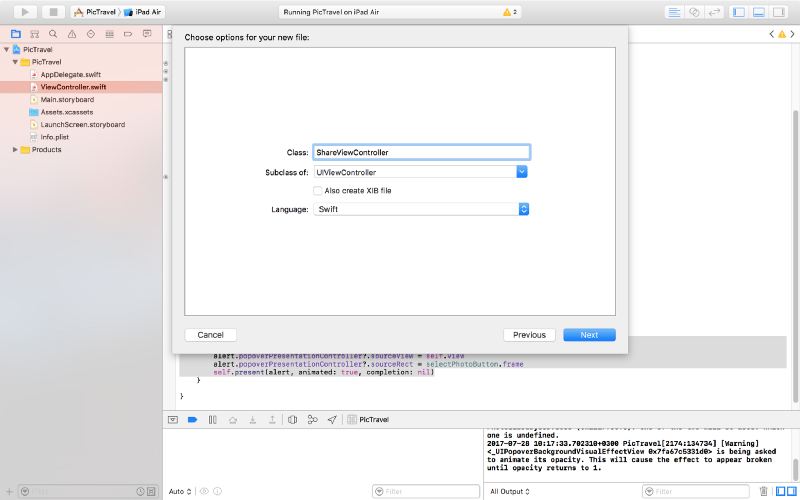
Click Next one more time and be sure to have the PicTravel Group selected and PicTravel target checked. Then Create the file.
Go back to the Main.storyboard and select the second view controller and set it’s class to the new ShareViewController we just created (you can do this from the Identity inspector, the Class dropdown).
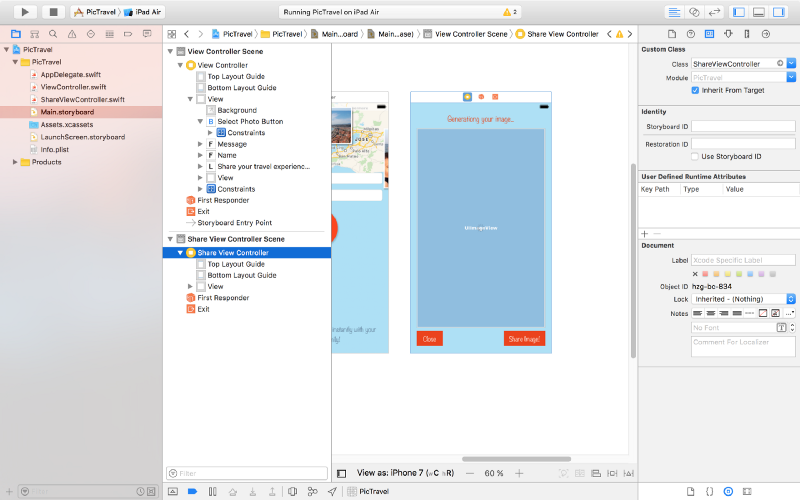
Now, with the view controller still selected, open the assistant editor and make sure it is set to automatically open the associated file. This should be the ShareViewController class. Ctrl+drag from the Image View, Activity Indicator and the Label to the class to create outlets for them:
@IBOutlet weak var imageView: UIImageView!
@IBOutlet weak var activityIndicator: UIActivityIndicatorView!
@IBOutlet weak var titleLabel: UILabel!

Also add some new variables for the user’s image, name and message:
var image: UIImage!
var name: String!
var message: String!
So, here’s what we will do next: when the user chooses an image, we instantiate the ShareViewController, set its image, name and message properties to the user’s data then present the ShareViewController.
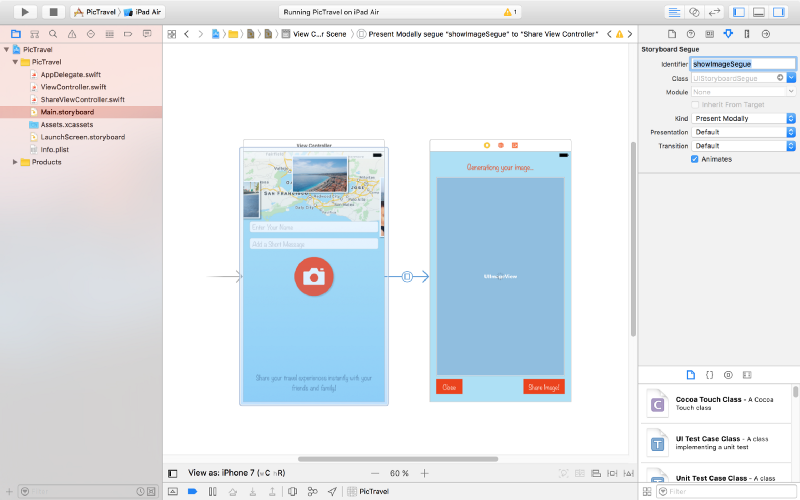
To do this we need to create a segue (transition). Close the assistant editor then, in the Main.storyboard, Ctrl+drag from the first “View Controller” (click on the yellow symbol from the top-right) to the “Share View Controller” and define a “Present Modally” segue. then click on the created segue and set it’s identifier to showImageSegue (we will need this later in the code to identify this specific segue).
Now open our ViewController class. Add a new method to be called when the user selects an image (this is part of the UIImagePickerControllerDelegate):
func imagePickerController(_ picker: UIImagePickerController, didFinishPickingMediaWithInfo info: [String : Any]) {
    dismiss(animated: true, completion: nil)
    image = info[UIImagePickerControllerOriginalImage] as! UIImage
    performSegue(withIdentifier: "showImageSegue", sender: self)
}
Here’s what this method does:
- dismiss the image picker controller
- get the image in a class variable
- present the ShareViewController by performing the
showImageSeguesegue
For this we need a new image variable to be defined in our ViewController class:
var image: UIImage!
To send the data to the ShareViewController, we will use a method that is called just before the segue to the new view controller happens:
override func prepare(for segue: UIStoryboardSegue, sender: Any?) {
    if segue.identifier == "showImageSegue" {
        if let shareViewController = segue.destination as? ShareViewController {
            shareViewController.image = self.image
            shareViewController.name = name.text ?? ""
            shareViewController.message = message.text ?? ""
        }
    }
}
Now run the app. After the user selects an image, the second view controller should be presented to the user. But… we have no way to close it. Let’s do this next.
Still in the ViewController, create an action that will be called when the ShareViewController will exit (here we will also set the image to nil to free the memory because we don’t need it anymore):
@IBAction func exit(unwindSegue: UIStoryboardSegue) {
    image = nil
}
Back to the Main.storyboard, Ctrl+drag from the Close button to the exit symbol from the top-right of the ShareViewController and select the exit method when prompted.
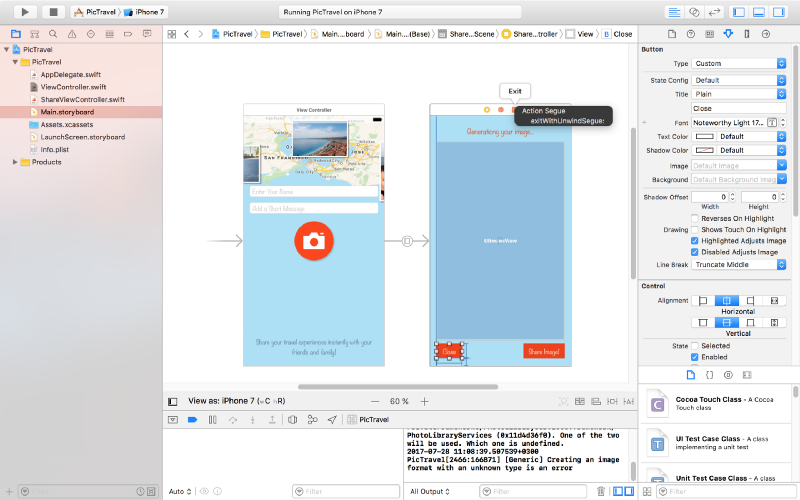
This should solve our problem of closing the second screen.
Let’s get now to the main objective of our app: get the user’s location, generate a map image and put the photo the user selected on top of it together with the name, location and message.
To continue, add some constants to the ShareViewController class that will be used in the code that follows:
// some constants used to generate the final image
let finalImageMaxDimension: CGFloat = 2048
let finalImageBorderWidth: CGFloat = 4
let userImageMaxDimension: CGFloat = 1200
let userImageBorderWidth: CGFloat = 20
let userImageX: CGFloat = 100
let userImageY: CGFloat = 160
let mapRegionDistance: CLLocationDistance = 600
let rotateContentByDegrees: CGFloat = -4
let userMessageMaxLength = 100
let textMargin: CGFloat = 280
let userMessageTopMargin: CGFloat = 60
let userNameTopMargin: CGFloat = 80
let userNameHeight: CGFloat = 120
Getting Current User Location
First we need to add a new key to Info.plist, Privacy - Location When In Use Usage Description with the value of Current location is needed to generate a map image of your location.
Now we need to import CoreLocation into our ShareViewController:
import UIKit
import CoreLocation
Declare a new locationManager variable:
var locationManager:CLLocationManager!
Add a new method that will start the process of finding the user location:
func getCurrentLocation() {
    locationManager = CLLocationManager()
    locationManager.delegate = self
    locationManager.desiredAccuracy = kCLLocationAccuracyNearestTenMeters
    locationManager.requestWhenInUseAuthorization()
    if (CLLocationManager.authorizationStatus() == .denied) {
        showError(title: "Location Access Denied", message: "The location permission was not authorized. Please enable it in Privacy Settings to allow the app to get your location and generate a map image based on that.")
    }

    if CLLocationManager.locationServicesEnabled() {
        locationManager.startUpdatingLocation()
    }
}
For this to work we need to implement the CLLocationManagerDelegate protocol:
class ShareViewController: UIViewController, CLLocationManagerDelegate {We also need to define the showError function:
func showError(title: String, message: String)
{
    let alert = UIAlertController(title: title, message: message, preferredStyle: .alert)
    let action = UIAlertAction(title: "OK", style: .default, handler: { _ in
        self.dismiss(animated: true, completion: nil)
    })
    alert.addAction(action)

    present(alert, animated: true, completion: nil)
}
Now implement the method of the CLLocationManagerDelegate protocol that is called when we get a location update:
func locationManager(_ manager: CLLocationManager, didUpdateLocations locations: [CLLocation]) {
    let location = locations[0]
    manager.stopUpdatingLocation()

    // get city & country name
    let geocoder = CLGeocoder()
    geocoder.reverseGeocodeLocation(location, completionHandler: { placemarks, error in
        if error != nil {
            self.showError(title: "Whoops...", message: error!.localizedDescription)
        } else {
            let placemark = placemarks?[0]
            self.locationString = (placemark?.administrativeArea ?? "") + ", " + (placemark?.country ?? "")
            self.generateMapImage(location: location)
        }
    })
}
This method will receive the user’s location, stop the location updates (because we don’t need them anymore) and calls a generateMapImage function (that we’ll define later) with the retrieved location as an argument. It also uses the Apple’s geocoder service to find out the city and country name for the retrieved location and puts them in a new class variable locationString:
var locationString = ""
Generate the Map Image
To generate the map image we will use the following function:
func generateMapImage(location userLocation: CLLocation) {
    let mapSnapshotOptions = MKMapSnapshotOptions()

    // Set the region of the map that is rendered.
    let location = CLLocationCoordinate2DMake(userLocation.coordinate.latitude, userLocation.coordinate.longitude)
    let region = MKCoordinateRegionMakeWithDistance(location, mapRegionDistance, mapRegionDistance)
    mapSnapshotOptions.region = region

    // Set the size of the image output.
    mapSnapshotOptions.size = calculateMapImageSize(image: self.image)

    let snapShotter = MKMapSnapshotter(options: mapSnapshotOptions)
    snapShotter.start(completionHandler: { snapShot, error in
        if error != nil {
            self.showError(title: "Whoops1...", message: error!.localizedDescription)
        } else {
            self.mapImage = snapShot?.image
            self.activityIndicator.stopAnimating()
            self.generateFinalImage()
        }
    })
}
You need to import MapKit into ShareViewController:
import MapKit
Also a new class variable is used:
var mapImage: UIImage!
To calculate the map size we used another function, calculateMapImageSize that returns a CGSize object to be used when generating the map image:
func calculateMapImageSize() -> CGSize  {
    let maxSize = finalImageMaxDimension - 2 * finalImageBorderWidth
    if image.size.width > image.size.height {
        return CGSize(width: maxSize, height: round(maxSize * image.size.height / image.size.width))
    } else {
        return CGSize(width: round(maxSize * image.size.width / image.size.height), height: maxSize)
    }
}
Building the Final Image
The last thing we need to do is to generate the final image with all the pieces put together:
func generateFinalImage() {
    let size = CGSize(width: mapImage.size.width + 2 * finalImageBorderWidth, height: mapImage.size.height + 2 * finalImageBorderWidth)
    let userImageSize = calculateUserImageFinalSize()

    // start drawing context
    UIGraphicsBeginImageContextWithOptions(size, true, 0.0)
    let context = UIGraphicsGetCurrentContext()

    // draw the white background
    let bgRectangle = CGRect(x: 0, y: 0, width: mapImage.size.width + 2 * finalImageBorderWidth, height: mapImage.size.height + 2 * finalImageBorderWidth)
    context!.saveGState()
    context!.setFillColor(UIColor.white.cgColor)
    context!.addRect(bgRectangle)
    context!.drawPath(using: .fill)
    context!.restoreGState()

    // draw the map
    mapImage.draw(in: CGRect(x: finalImageBorderWidth, y: finalImageBorderWidth, width: mapImage.size.width, height: mapImage.size.height))

    // draw a semitransparent white rectage over the  map to dim it
    let transparentRectangle = CGRect(x: finalImageBorderWidth, y: finalImageBorderWidth, width: mapImage.size.width, height: mapImage.size.height)
    context!.saveGState()
    context!.setFillColor(UIColor(colorLiteralRed: 255, green: 255, blue: 255, alpha: 0.3).cgColor)
    context!.addRect(transparentRectangle)
    context!.drawPath(using: .fill)
    context!.restoreGState()

    // rotate the context
    context!.rotate(by: (rotateContentByDegrees * CGFloat.pi / 180))

    // draw white rectangle
    let rectangle = CGRect(x: userImageX, y: userImageY, width: userImageSize.width + 2 * userImageBorderWidth, height: userImageSize.height + 2 * userImageBorderWidth)
    context!.saveGState()
    context!.setFillColor(UIColor.white.cgColor)
    context!.setShadow(offset: CGSize(width: userImageBorderWidth, height: userImageBorderWidth), blur: 8.0)
    context!.addRect(rectangle)
    context!.drawPath(using: .fill)
    context!.restoreGState()

    // draw user image
    image.draw(in: CGRect(x: userImageX + userImageBorderWidth, y: userImageY + userImageBorderWidth, width: userImageSize.width, height: userImageSize.height))

    // draw message
    var truncatedMessage = message
    if (message.distance(from: message.startIndex, to: message.endIndex) > userMessageMaxLength) {
        truncatedMessage = message.substring(to: message.index(message.startIndex, offsetBy: userMessageMaxLength))
    }
    let messageFont = UIFont(name: "Noteworthy-Bold", size: 80)!
    let messageFontAttributes = [
        NSFontAttributeName: messageFont,
        NSForegroundColorAttributeName: UIColor.black,
        ] as [String : Any]
    let messageSize = sizeOfString(string: truncatedMessage!, constrainedToWidth: Double(size.width - textMargin), attributes: messageFontAttributes)
    truncatedMessage!.draw(in: CGRect(x: userImageX + userImageBorderWidth, y: userImageY + userImageBorderWidth + userImageSize.height + userMessageTopMargin, width: size.width - textMargin, height: messageSize.height), withAttributes: messageFontAttributes)

    // draw name, location & date
    let nameFont = UIFont(name: "Noteworthy", size: 58)!
    let nameFontAttributes = [
        NSFontAttributeName: nameFont,
        NSForegroundColorAttributeName: UIColor.black,
        ] as [String : Any]
    let dateFormatter = DateFormatter()
    dateFormatter.dateStyle = .long
    dateFormatter.timeStyle = .none

    var nameString = ""
    if(name != "") {
        nameString = name + " - " + dateFormatter.string(from: Date()) + ", " + locationString
    } else {
        nameString = dateFormatter.string(from: Date()) + ", " + locationString
    }
    nameString.draw(in: CGRect(x: userImageX + userImageBorderWidth, y: userImageY + userImageBorderWidth + userImageSize.height + messageSize.height + userNameTopMargin, width: size.width - textMargin, height: userNameHeight), withAttributes: nameFontAttributes)

    // get final image
    let finalImage = UIGraphicsGetImageFromCurrentImageContext()

    // end drawing context
    UIGraphicsEndImageContext()

    // show the final image to the user & update tha status label
    imageView.image = finalImage
    titleLabel.text = "You can now share your image."
}
Here we used two helper methods, calculateUserImageFinalSize and sizeOfString. The last one deserves a little attention because it will return a CGSize object with the dimensions needed to draw a text with specific attributes.
func calculateUserImageFinalSize() -> CGSize  {
    if image.size.width > image.size.height {
        return CGSize(width: userImageMaxDimension, height: round(userImageMaxDimension * image.size.height / image.size.width))
    } else {
        return CGSize(width: round(userImageMaxDimension * image.size.width / image.size.height), height: userImageMaxDimension)
    }
}

func sizeOfString (string: String, constrainedToWidth width: Double, attributes: [String: Any]) -> CGSize {
    let attString = NSAttributedString(string: string,attributes: attributes)
    let framesetter = CTFramesetterCreateWithAttributedString(attString)

    return CTFramesetterSuggestFrameSizeWithConstraints(framesetter, CFRange(location: 0,length: 0), nil, CGSize(width: width, height: .greatestFiniteMagnitude), nil)
}
Now that we have everything in place, we need to start the whole process when the ShareViewController is loaded and presented to the user:
override func viewDidAppear(_ animated: Bool) {
    super.viewDidAppear(animated)
    getCurrentLocation()
}
Test the app. Enter your name, a short message and select a photo. You should get the following result:
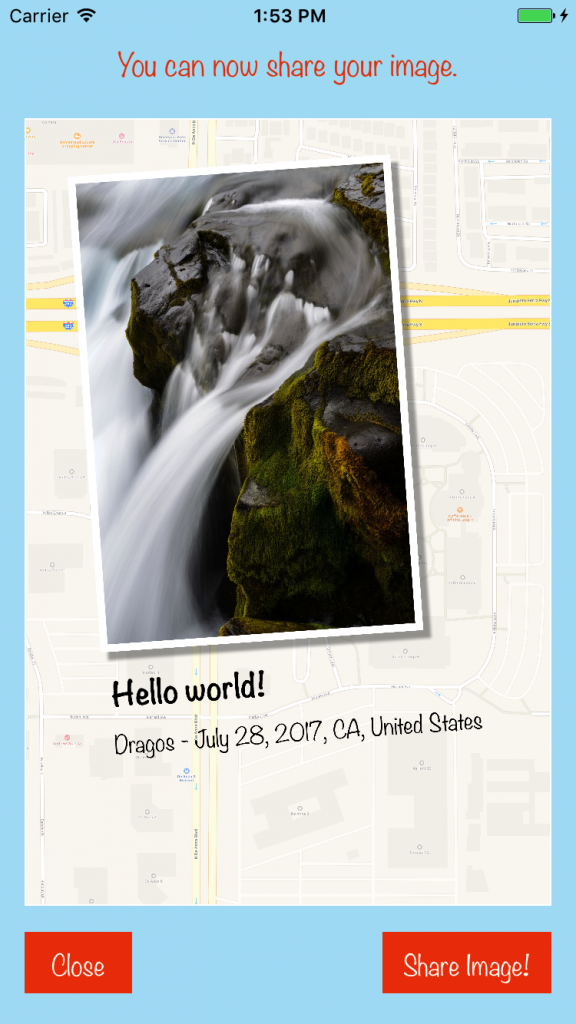
Sharing the Final Image
Ok, now let’s see how do we share the resulted image. To do this we will use an UIActivityViewController.
Add a new shareImage action for the Share Image! button using Ctrl+drag into the ShareViewController like we did earlier for the photo button:
@IBAction func shareImage(_ sender: UIButton) {
}
The code for the actual sharing is pretty simple:
@IBAction func shareImage(_ sender: UIButton) {
    let activityViewController = UIActivityViewController(activityItems: [image], applicationActivities: nil)
    activityViewController.popoverPresentationController?.sourceView = self.view
    present(activityViewController, animated: true, completion: nil)
}
Try it! Now you can save the image or share it with your friends & family using the installed apps on your device.
Final Touches
To finish the app we need to do two more things:
- add an app icon
- make the startup screen look good
To add an app icon, first download the images from here, then open the Assets.xcassets from the left panel, select the AppIcon item and drag&drop downloaded images to their respective placeholders.
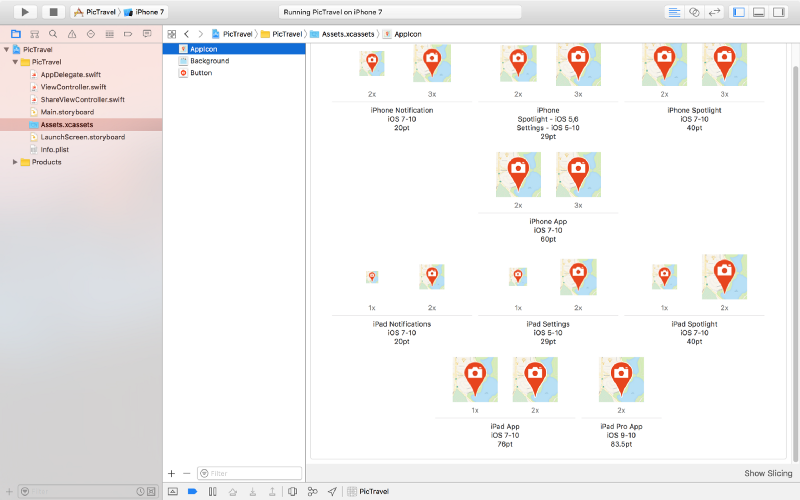
To change the startup screen , which is white right now, open the LaunchScreen.storyboard from the left panel and drag an Image View to it. Add constraints so it covers the entire screen, select the Background Image and set the Content Mode to Aspect Fill (it will look exactly like our main app's screen background).
That’s it! You can now run the app and even install it on your device to take it out in the wild.
The code for this app is available on github: https://github.com/intelligentbee/PicTravel
You can also download the final app from the App Store: https://itunes.apple.com/us/app/pictravel/id1263495901?mt=8

Introduction to React Native
React Native is a framework for building native apps using React made by Facebook. With React Native, you don't build a “mobile web app”, an “HTML5 app”, or a “hybrid app”. You build a real mobile app that's indistinguishable from an app built using Objective-C or Java. React Native uses the same fundamental UI building blocks as regular iOS and Android apps. You just put those building blocks together using JavaScript and React. - from https://facebook.github.io/react-native/
In the following lines we will take a short tour of React Native to help you familiarize with the platform and hopefully get you started in your React Native development career.
We will create a simple app called RandomNumbers that will pick some numbers from a pool, numbers that you can use later at anything you need (for example playing the lottery).
Install React Native
You will need to install Node, Watchman, the React Native command line interface, a JDK, and Xcode or Android Studio (or both). You can find details on how exactly do to this, depending on your platform, here: https://facebook.github.io/react-native/docs/getting-started.html. Select the "Building Projects with Native Code" tab and then follow the instructions.
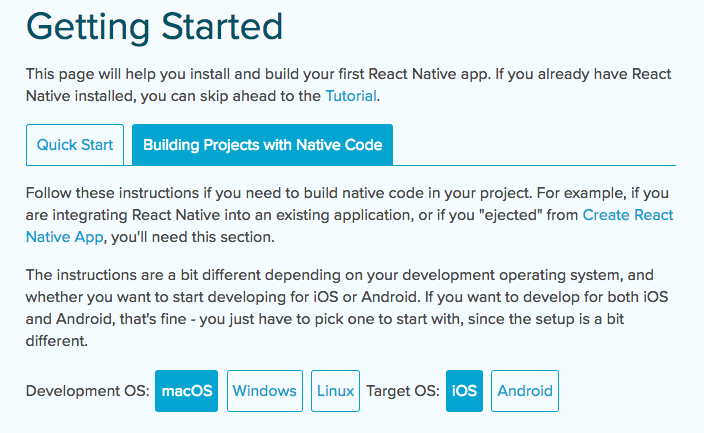
When you’re done, create a new project with the react-native init RandomNumbers command then cd into the newly created RandomNumbers folder.
The above command created an empty React Native project that you can immediately run on your device using the react-native run-ios or react-native run-android commands (you need to have an Android emulator already started for the last command to work).

Make Your First Change
Open the RandomNumbers folder in an code editor of your choice. Here you will find some files and folders, the most important ones being the index.ios.js and index.android.js files that contain our starting point of the app.
Edit one (or both) of the files above, depending on the platform you are testing, to the following:
// ...

export default class RandomNumbers extends Component {
  render() {
    return (
      <View style={styles.container}>
        <Text style={styles.welcome}>
          Random Numbers
        </Text>
      </View>
    );
  }
}

// ...
Save the edited file, then, in the emulator, press Cmd+R to reload the app. It will refresh itself to reflect the changes, no recompiling needed. Isn’t this cool?
React Native Components
Just like in React, a React Native app is made up by several components that work together to achieve the ultimate goal of the app. To see the list of available components visit https://facebook.github.io/react-native/docs/getting-started.html and scroll to the Components section in the left menu.
We will start by making the two React Native starting points (from the index.ios.js and index.android.js files) to load a single component called App.
Create a new App.js file with the following content:
import React, { Component } from 'react';
import {
    View,
    Text,
    StyleSheet
} from 'react-native';

export default class App extends Component {
    render() {
        return (
            <View style={styles.container}>
                <Text style={styles.welcome}>
                    Random Numbers
                </Text>
            </View>
        );
    }
}

const styles = StyleSheet.create({
    container: {
        flex: 1,
        justifyContent: 'center',
        alignItems: 'center',
        backgroundColor: '#F5FCFF',
    },
    welcome: {
        fontSize: 20,
        textAlign: 'center',
        margin: 10,
    },
});
Now change the index.ios.js and index.android.js to the following (both will have the same content):
import React, { Component } from 'react';
import {
  AppRegistry
} from 'react-native';
import App from './App';

export default class RandomNumbers extends Component {
  render() {
    return (
       <App />
    );
  }
}

AppRegistry.registerComponent('RandomNumbers', () => RandomNumbers);
We just removed everything from them and loaded the App component so we now have a common starting point for both platforms.
Generate a Random Number
Let’s add a Button that will trigger the number generator of our app. First import the Button component, then add the actual button to the render method (in App.js):
// ...

import {
    View,
    Text,
    Button,
    StyleSheet
} from 'react-native';

export default class App extends Component {
    render() {
        return (
            <View style={styles.container}>
                <Text style={styles.welcome}>
                    Random Numbers
                </Text>
                <Button onPress={this.generateRandomNumber} title="Generate!" />
            </View>
        );
    }
}

// ...
For this to work we need to define a new method generateRandomNumber:
// ...

export default class App extends Component {
    generateRandomNumber = () => {
        let random = Math.floor(Math.random() * 100);
        console.log(random);
    }

// ...
Now if you click on the Generate! button, a random number between 0 and 100 will be generated and printed to the console.
To see the console output open the developer menu in your app by pressing Cmd+D and select Debug JS Remotely. A new browser window will open and there you can check the console output like you normally do when developing for the web.
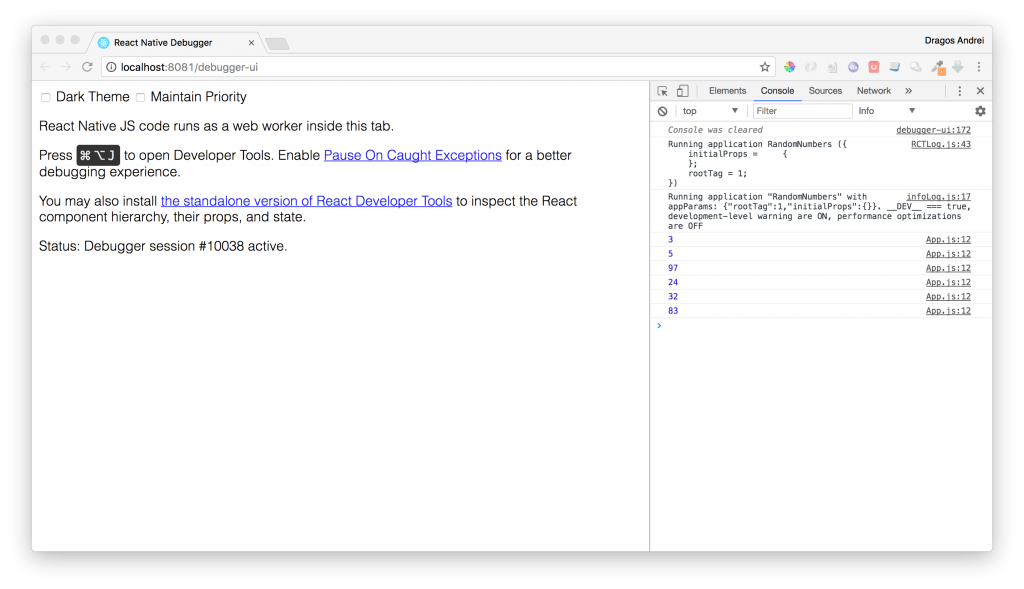
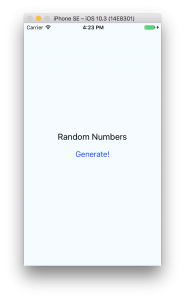
Output Data to the Screen
Now we have our generated random number, but how can we show it to the user? For this we will use the state concept of React. The are two fundamental concepts of React that you need to understand: the state and props.
There are two types of data that control a component: props and state. Props are set by the parent and they are fixed throughout the lifetime of a component. For data that is going to change, we have to use state.
You can read more about this topic here:
- https://facebook.github.io/react-native/docs/props.html
- https://facebook.github.io/react-native/docs/state.html
Start by creating a constructor for our App component that sets the initial state:
// ...

export default class App extends Component {
    constructor(props) {
        super(props);

        this.state = {
            random: null
        };
    }

// ...
In the generateRandomNumber method, change the state to contain the newly generated number:
// ...

generateRandomNumber = () => {
    let random = Math.floor(Math.random() * 100);
    this.setState({random: random});
}

// ...
Finally add a new Text component in the render() method that will show the random number from the app’s state:
// ...

render() {
    return (
        <View style={styles.container}>
            <Text style={styles.welcome}>
                Random Numbers
            </Text>
            <Text>{this.state.random}</Text>
            <Button onPress={this.generateRandomNumber} title="Generate!" />
        </View>
    );
}

// ...
Now, every time you click the Generate! button a new random number will appear on the screen.
How Many Numbers?
What if you need more than one number, extracted from a pool of numbers?
To define the pool of numbers we will use a slider with values from 1 to 100. To define how many numbers do we need to be extracted from the pool, we will use a picker with values from 1 to 10. This way we can configure the app to do what we need at run-time.
Import the Slider component then add it to the app:
<Text style={styles.welcome}>
    Random Numbers
</Text>
<Slider style={{width: '100%'}} minimumValue={1} maximumValue={100} />
<Text>{this.state.random}</Text>
We need to show the current slider value to the user so we will add it to the state of our app:
this.state = {
    random: null,
    pool: 1
};
When the slider moves, we have to update the state:
<Slider style={{width: '100%'}} minimumValue={1} maximumValue={100} onValueChange={(value) => this.setState({pool: Math.round(value)})} />Add a new text component to show it to the user (and an informative label):
<Text style={styles.welcome}>
    Random Numbers
</Text>
<Text>Pool of numbers:</Text>
<Text>{this.state.pool}</Text>
Now to select how many numbers we need, let’s try a picker:
<Picker selectedValue={this.state.amount} style={{width: '100%'}} onValueChange={(itemValue, itemIndex) => this.setState({amount: itemValue})}>
    <Picker.Item label="1" value="1" />
    <Picker.Item label="2" value="2" />
    <Picker.Item label="3" value="3" />
    <Picker.Item label="4" value="4" />
    <Picker.Item label="5" value="5" />
    <Picker.Item label="6" value="6" />
    <Picker.Item label="7" value="7" />
    <Picker.Item label="8" value="8" />
    <Picker.Item label="9" value="9" />
    <Picker.Item label="10" value="10" />
</Picker>
For this we added amount to the state:
this.state = {
    random: null,
    pool: 1,
    amount: 1
};
Now let’s change the generateRandomNumbers method to take in account the new settings:
generateRandomNumber = () => {
    // build the pool of numbers
    var pool = [];
    for(let i = 1; i <= this.state.pool; i++) {
        pool.push(i);
    }

    // generate random numbers
    var randomString = '';
    for(let i = 1; i <= this.state.amount; i++) {
        let index = Math.floor(Math.random() * pool.length);
        let random = pool[index];
        pool.splice(index, 1);
        randomString = randomString + (randomString ? ", " : "") + random;
    }
    this.setState({random: randomString});
}
What if you try to generate 10 numbers out of 5? Or something like this? We will have to tell the user that’s not possible using an alert.
generateRandomNumber = () => {
    if(this.state.amount > this.state.pool) {
        Alert.alert("Error", "The pool must not be smaller than the amount of numbers you want to generate!");
        return;
    }

    // ...
That’s all we had to do for our app functionality. Try it!
... but, to be honest, it doesn't look so good :(
Making the App Look Good
Let’s start by adding a nice background to our app. First download the image from here and save it to your project folder. Then replace the root <View> with an <Image> component (also be sure to include the Image component at the beginning of the file):
<Image source={require('./background.png')} style={styles.container}>
…
</Image>
Update the container style to this:
container: {
    flex: 1,
    padding: 15,
    backgroundColor: '#fff',
    alignItems: 'center',
    justifyContent: 'space-between',
    width: null,
    height: null
}
Now, let’s take care of the button. We will remove the <Button> component because it’s not as customizable as we need and replace it with a <TouchableOpacity> (don’t forget to include this component too and remove the <Button> from the includes because we will not use it anymore). Also get the button background image from here.
<TouchableOpacity onPress={this.generateRandomNumber}>
    <Image style={styles.button} source={require('./button.png')}>
        <Text style={styles.buttonText}>Generate!</Text>
    </Image>
</TouchableOpacity>
Next we will use some styling for the rest of the components, here is all the render() code and styles:
render() {
    return (
        <Image source={require('./background.png')} style={styles.container}>
            <Text style={styles.textTitle}>Random Numbers</Text>
            <Text style={styles.text}>Pool of numbers:</Text>
            <Text style={styles.text}>{this.state.pool}</Text>
            <Slider
                style={styles.slider}
                minimumValue={1}
                maximumValue={100}
                onValueChange={(value) => this.setState({pool: Math.round(value)})}
                minimumTrackTintColor="#a0a0a0"
                maximumTrackTintColor="#a0a0a0"
                thumbTintColor="#ff0000"
                thumbImage={require('./thumb.png')}
            />
            <Text style={styles.resultText}>{this.state.random}</Text>
            <Picker
                selectedValue={this.state.amount}
                style={styles.picker}
                itemStyle={styles.pickerItem}
                onValueChange={(itemValue, itemIndex) => this.setState({amount: itemValue})}>
                <Picker.Item label="1" value="1" color="#FF6600" />
                <Picker.Item label="2" value="2" color="#FF6600" />
                <Picker.Item label="3" value="3" color="#FF6600" />
                <Picker.Item label="4" value="4" color="#FF6600" />
                <Picker.Item label="5" value="5" color="#FF6600" />
                <Picker.Item label="6" value="6" color="#FF6600" />
                <Picker.Item label="7" value="7" color="#FF6600" />
                <Picker.Item label="8" value="8" color="#FF6600" />
                <Picker.Item label="9" value="9" color="#FF6600" />
                <Picker.Item label="10" value="10" color="#FF6600" />
            </Picker>
            <TouchableOpacity onPress={this.generateRandomNumber}>
                <Image style={styles.button} source={require('./button.png')}>
                    <Text style={styles.buttonText}>Generate!</Text>
                </Image>
            </TouchableOpacity>
        </Image>
    );
}
const styles = StyleSheet.create({
container: {
flex: 1,
padding: 15,
backgroundColor: '#fff',
alignItems: 'center',
justifyContent: 'space-between',
width: null,
height: null
},
textTitle: {
color: '#ffffff',
backgroundColor: '#00000000',
fontSize: 28
},
text: {
color: '#ffffff',
backgroundColor: '#00000000'
},
resultText: {
color: '#ffffff',
backgroundColor: '#00000000',
fontSize: 18
},
slider: {
width: '100%'
},
picker: {
width: '100%',
backgroundColor: '#000000C0',
borderRadius: 10,
borderWidth: 2,
borderColor: '#000000'
},
pickerItem: {
color: '#ffffff'
},
button: {
flexDirection: 'row',
alignItems: 'center',
justifyContent: 'center',
width: 175,
height: 60
},
buttonText: {
color: '#ffffff',
fontWeight: 'bold',
backgroundColor: '#00000000'
}
});You will also need the slider thumb images from here and here.
If you run the app now, you will find a much better interface:

The images used in this tutorial were downloaded from pixabay.com then edited using Photoshop:
- https://pixabay.com/en/cube-play-random-luck-points-1979775/
- https://pixabay.com/en/button-click-hit-web-element-2155595/
- https://pixabay.com/en/buttons-gloss-round-circle-colors-150235/
Getting Your App Ready to Be Published
So our app is done, how do we publish it to the AppStore and Google Play Store?
First, let's fix one small problem: if you rotate your emulator screen (Cmd+Left or Right Arrow) you will see that the app will go into landscape and it will not be usable anymore :(

Too lock the app to portrait we need to go "native".
For iOS, open xCode then open the project found in the randomNumbers/ios folder. Select the project in the left pane then, under Deployment Info, uncheck Landscape Left and Landscape Right Device Orientation so we are only left with the Portrait orientation.
For Android, you can just open the android/app/src/AndroidManifest.xml and add android:screenOrientation="portrait" under the activity section:
<activity
    android:name=".MainActivity"
    android:label="@string/app_name"
    android:configChanges="keyboard|keyboardHidden|orientation|screenSize"
    android:screenOrientation="portrait"
    android:windowSoftInputMode="adjustResize">
    <intent-filter>
        <action android:name="android.intent.action.MAIN" />
        <category android:name="android.intent.category.LAUNCHER" />
    </intent-filter>
</activity>
Now, to see those changes, you have to relaunch the app again. Not just reload, relaunch with the react-native run-ios or react-native run-android commands and try to rotate the emulator. Everything should be fine this time.
Now back to our main task, getting the app ready to be published.
iOS
First let's add the app's icons. Open the xCode project and select Images.xcassets from the left panel. Then select the AppIcon item and drag each icon image to its corresponding placeholder. Download the icons from here.
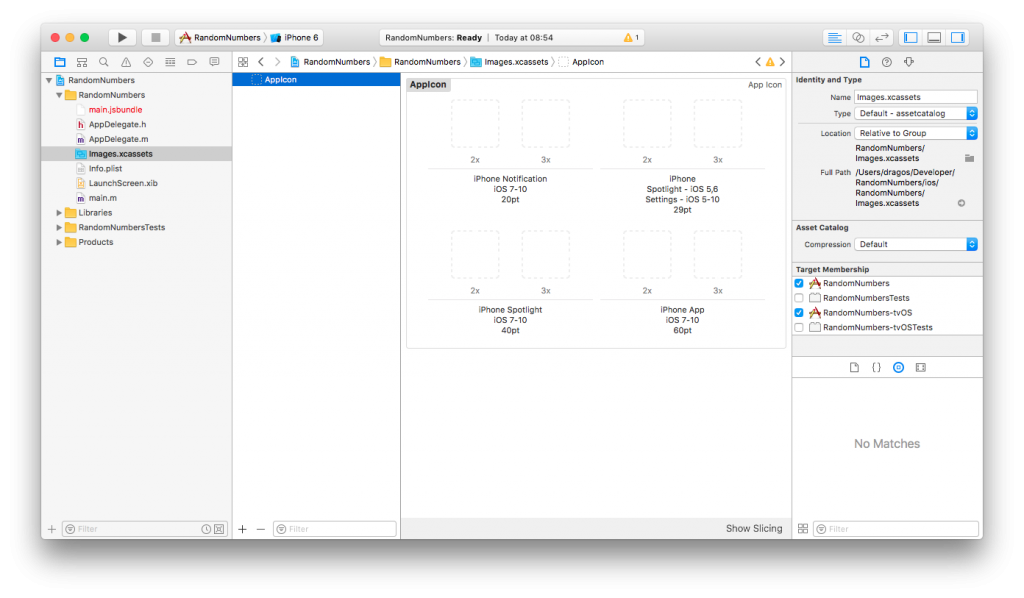
When you're done, select Product -> Archive from the menu to build the iOS package (it only works with a Generic iOS Device selected or a real device, no emulators).
Android
To add app icons in Android, you have to put them in the android/app/src/main/res/mipmap* folders (overwrite the existing ic_launcher.png). You can get the icons from here.
Now you need to generate a signing key then a signed APK. I found the walkthrough from the React Native documentation to be pretty good so you just follow it: https://facebook.github.io/react-native/docs/signed-apk-android.html
Final Words
That's it! You now have your first React Native application ready to be sent into the wild. I hope you had fun doing this, please let us know in the comments how it worked for you. Oh, and you can find the final code here.
Have a nice mobile developer life! :)

How to add TINYINT MySQL type to Doctrine in Symfony 2.8
Hello! A few days ago I needed to define an entity with a TINYINT type column to hold a rating value between 1 and 5. I was doing this in a Symfony 2.8 project and to my surprise, Doctrine was unable to handle this type of data out of the box (it uses it for booleans but it has no TINYINT standalone type).
So I searched the internet for a solution and I found some but nothing complete.
The solution (TINYINT vs Doctrine):
First you need to define the new Doctrine type class like this:
<?php
namespace AppBundle\Types;


use Doctrine\DBAL\Types\Type;
use Doctrine\DBAL\Platforms\AbstractPlatform;


class TinyintType extends Type
{
    const TINYINT = 'tinyint';


    public function getSQLDeclaration(array $fieldDeclaration, AbstractPlatform $platform)
    {
        return 'TINYINT';
    }


    public function convertToPHPValue($value, AbstractPlatform $platform)
    {
        return $value;
    }


    public function convertToDatabaseValue($value, AbstractPlatform $platform)
    {
        return $value;
    }


    public function getName()
    {
        return self::TINYINT;
    }
}
Then, to register it, I used the boot function of the AppBundle:
<?php
namespace AppBundle;


use Symfony\Component\HttpKernel\Bundle\Bundle;
use Doctrine\DBAL\Types\Type;


class AppBundle extends Bundle
{
    public function boot()
    {
        parent::boot();

        $em = $this->container->get('doctrine.orm.default_entity_manager');

        // types registration
        if(!Type::hasType('tinyint')) {
            try {
                Type::addType('tinyint', 'AppBundle\Types\TinyintType');
                $em->getConnection()->getDatabasePlatform()->registerDoctrineTypeMapping('TINYINT', 'tinyint');
            } catch (\Exception $e) {

            }
        }
    }
}
I had to use the try / catch block to avoid an error when running symfony console commands having no database defined:
PHP Fatal error: Uncaught exception 'PDOException' with message 'SQLSTATE[42000] [1049] Unknown database 'rating'' in vendor/doctrine/dbal/lib/Doctrine/DBAL/Driver/PDOConnection.php:43
Now you can use the new type in your entities:
    /**
     * @ORM\Column(name="rating", type="tinyint")
     * @Assert\NotBlank()
     * @Assert\GreaterThanOrEqual(
     *     value = 1
     * )
     * @Assert\LessThanOrEqual(
     *     value = 5
     * )
     */
    protected $rating;
Learn how to setup Docker machine for Symfony development.
Hope this helps someone :)
Have a great day!

Node.js Guide: A List of Top Node.js Frameworks, Tools, and IDEs
Created by Ryan Dahl in 2009, Node.js is an open-source platform built using the Google Chrome JavaScript runtime. It enables software and app developers to build fast and scalable web applications using just a few lines of code.
The official website of Node.js described it as:
“Node.js® is a JavaScript runtime built on Chrome's V8 JavaScript engine. Node.js uses an event-driven, non-blocking I/O model that makes it lightweight and efficient. Node.js' package ecosystem, npm, is the largest ecosystem of open source libraries in the world.”
The world of custom software development constantly evolves with new trends, techniques, and languages. But, with the Node.js library of modules, app development is significantly simplified. It provides quick and efficient solutions for back-end development and it integrates well with front-end platforms.
Web and network server applications written using Node.js are becoming more and more prevalent. Independent app and software developers, web design agencies, IT companies, and businesses both small and large utilize Node.js for various projects and applications.
We’ve collated a comprehensive guide on the top frameworks, tools, and IDEs for Node.js to further streamline your workflow.
Frameworks for Node.js
Node.js frameworks are increasingly gaining prominence in web programming and application development. Their main objective is to get you up and running as fast as possible by providing functionality that is not available in Node.js out of the box. These features come in many flavors and most frameworks will try to envelop all you need to deliver your project.
Here are the latest framework innovations that expand the features and functionality of Node.js.
1. ActionHero
ActionHero is a Node.js API server and framework that offers custom packages for companies of all sizes with high-end customer support.
At it’s core it allows you to write a RESTful API that you can consume either via HTTP, WebSockets or plain TCP Socket connections. You can also do this by using a front-end ActionHero Client that’s based on Primus that the framework provides.
You can use it to easily provide a real-time information to your users and even allow them to talk to each other using chat rooms that are natively supported by this framework.
This framework also provides scalability out of the box, as such, it relies on Redis in order to communicate with other nodes in the network.
Top companies such as Riot Games, Samsung, Task Rabbit, and Madglory utilize the ActionHero framework.
2. Derby.js
Derby is a full stack MVC framework used for modern web applications. A differentiating feature of Derby is that it allows you to sync JSON and text data between browsers, servers and databases for real-time collaboration.
If you have a heavy front-end then, then this framework is for you, as it supports server side rendering.
Additional features include offline usage, conflict resolution and template bindings to simplify writing multi-user applications.
3. Express
Distributed under the MIT license, Express is one of the most fundamental Node.js frameworks. It offers a flexible structure for processing requests. It integrates well with several community developed modules that cater to most project requirements.
This minimalistic framework is very lightweight, as such, it’s focused on performance above all. It also allows you to easily scaffold a project using a generator so that you can jump right into writing code.
Its features include simplified multiple routing, template engines, middlewares, and more.
MySpace, Geekli.st, Klout, Segment.io, and Yummly all use Express.
4. Hapi
Hapi is capable of building full websites and enterprise level functions. Walmart developers encountered extensibility and maintainability issues from the Express framework as their application grew in size. They needed another framework that can accommodate the the Black Friday influx of customers. Thus, Walmark developers created Hapi.
However, developers commonly use this rich framework for building services that pull data from the back-end and serve it efficiently, all while keeping well maintained code base.
Features include input and response validation, server-side caching, sessions, cookie-parsing, logging and others. Hapi also developed dozens of API development plugins for documentation, authentication, and other functions. Big brands such as Macy’s and Disney use Hapi.

5. Keystone
Keystone is another full stack, open-source framework based on Express, with a few other libraries. It can be used to create database-driven websites, applications, and APIs in Node.js. It’s stack includes the Express framework and MongoDB as a database.
It’s main selling point is that it provides an auto-generated Admin UI to manage your database driven website. With Keystone, you get the best features of Express and Mongoose combined, resulting in a robust CMS framework.
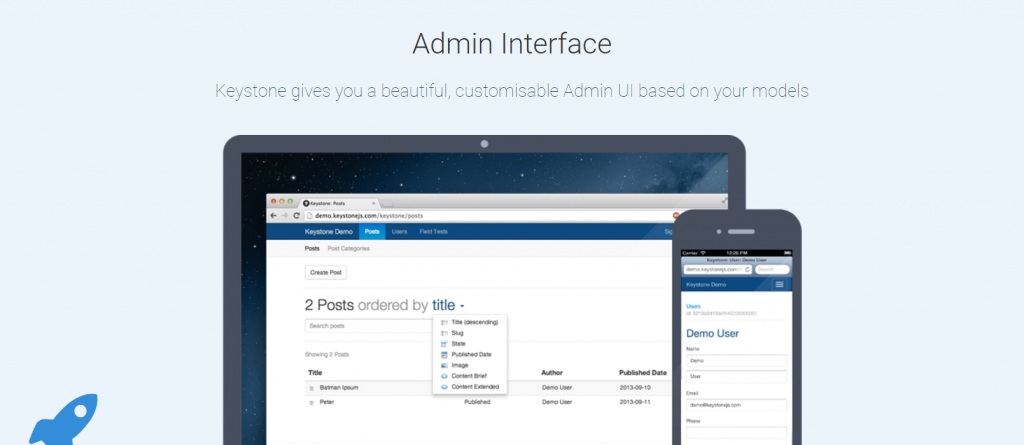
6. Koa.js
Dubbed as the “next generation web framework for Node.js”, Koa.js followed in the footsteps of Express. It provides a lightweight Node.js framework for building efficient web APIs and applications.
Koa.js utilizes generated-based control flows to eliminate callbacks and minimize errors. Unlike most frameworks, Koa is more modular and relies less on middleware. However, plugin packages are also available for routing, compression, caching and more.
7. Meteor
Meteor is a full stack framework for web and mobile applications. It boasts of a subscription-based cloud deployment service called Galaxy, which enables developers to easily deploy their applications in the cloud.
Global companies using Meteor include Mazda, Ikea, Qualcomm, and PGA Tour.
8. Sails
Sails is an MVC framework ideal for customized, data-driven web APIs for businesses and enterprises. It’s known for its capability to simplify processes for real-time chat applications, dashboards, and multiplayer games.
This framework comes bundled with an ORM that boasts support for any database. It also provides an easy way to generate RESTful APIs.
9. Total.js
Total.js is a full stack MVC framework written in pure JavaScript. It has everything other frameworks have and more. What sets it out from the crowd is it’s native support for processing media like images and video streaming.
It’s also compatible with client-side frameworks such as Angular.js, Polymer, Backbone.js, Bootstrap, jQuery, D3, as well as other frameworks mentioned above.

10. Restify
Restify is a Node.js module designed to create APIs by the book, allowing you to create an application that strictly conforms to all the rules of developing a correct REST web service. It focuses on debugging and profiling so that you can isolate systems and optimize your server performance.
Tools for Node.js
Node.js tools are used by web developers and software programmers for a wide variety of applications and workflows. These tools make it easier for developers working with Node.js.
Whether you’re an amateur or an expert developer, these Node.js tools will be useful for you.
1. Babel
Babel is a JavaScript transpiler commonly used as a tool for front-end development. It allows you to use all ES6 features while compiling ES5 for production. As a result, code readability is improved.
Babel supports the latest version of JavaScript so that you can use the newest syntax without waiting for browser support. It can also be integrated with other JavaScript tools.
2. Broccoli
Broccoli is a Node.js build tool running on an ES6 module that boasts of blazing rebuild and compile speeds, chainable plugins, and a flexible ecosystem. Broccoli dubbed itself as “the asset pipeline for ambitious applications.”
3. Electrode.io
Electrode.io is another tool built by developers of WalmartLab. It’s a universal platform for building both React.js and Node.js applications using the most standardized structures, advanced technology, and best practices.
With Electrode.io, greater focus is placed on consistency and universality instead of configuration and customization. This ensures reusability and performance.

4. Log.io
It can be difficult to monitor hundreds of files spread across various computers. Log.io is a real-time log monitoring tool to help you monitor your deployments and troubleshoot quickly. It exposes a stateless TCP API where you can write your logs to. You monitor your log messages in a single browser session, so you can address issues and bugs immediately.

5. Migrat
Migrat is a simple, yet pluggable, data migration tool that uses plain text. Designed for a variety of stacks and processes, Migrat runs migrations once globally or per server.
Migrat is not tied to any database engine, and can be found on GitHub and NPM.

6. PM2
As an advanced production process manager for Node.js, PM2 monitors all launched processes to determine whether they’re running properly.
According to Full Stack Developer, Mariusz Dybciak, “You don’t need to worry about restarting applications after they’ve crashed, PM2 does it for you.” The finance software company, Intuit, and the online payment gateway, PayPal, use PM2.
7. Webpack
JavaScript module bundling has been around for several years now, and helps developers and programmers save countless hours of manual labor.
Webpack is a JavaScript module bundler that simplifies deployments by creating bundles, and asynchronously loaded to reduce the loading time. With Webpack, bundling and serving assets are easy, quick, and painless.
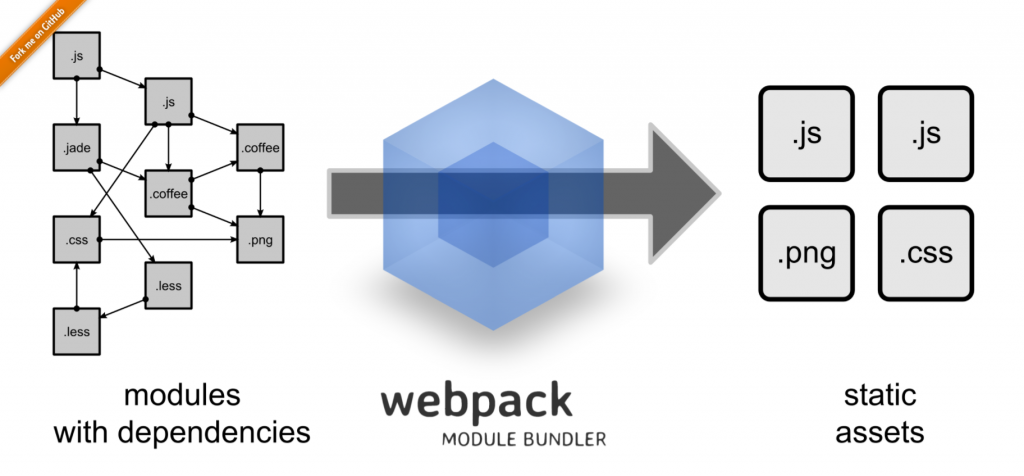
Integrated Development Environment (IDEs) for Node.js
An Integrated Development Environment (IDE) is a collection of tools used for a myriad of Node.js web applications. Most IDEs are used as a source code editor, automation tool builder, and a debugger. It lets web and app developers edit and debug their codes accurately and quickly.
We’ve picked out 15 modern and advanced IDEs for Node.js.
1. Aptana Studio
If you like Eclipse, then you should check out Aptana Studio. It’s an Eclipse-based IDE that was trimmed down to focus on web application technologies and popular frameworks.
With Aptana Studio, you can develop and test applications in a single environment, as it supports the latest browser languages such as HTML5, CSS3, JavaScript, Ruby, Rails, PHP, and Python.
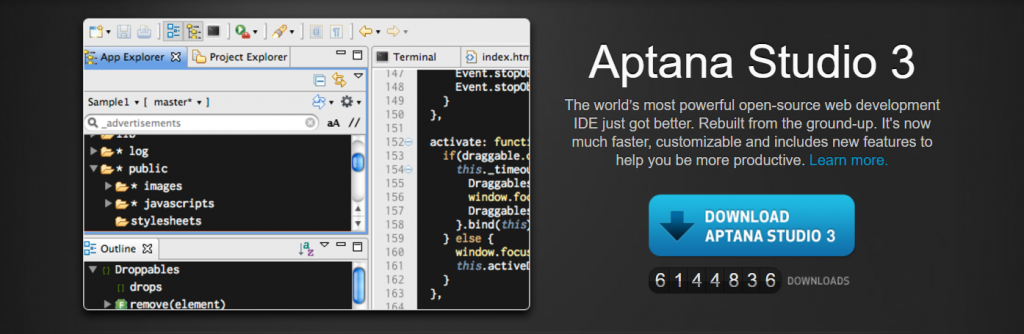
2. Atom
Atom is a modern, open-source text editor built with HTML, JavaScript, CSS, and Node.js integration. Its features include cross-platform editing on OS X, Windows, or Linux, a built-in package manager where you can search, install, and create new packages, and smart autocompletion to help you write codes faster.
The best thing about Atom is that it’s fully hackable and customizable. Even the core packages can be changed.
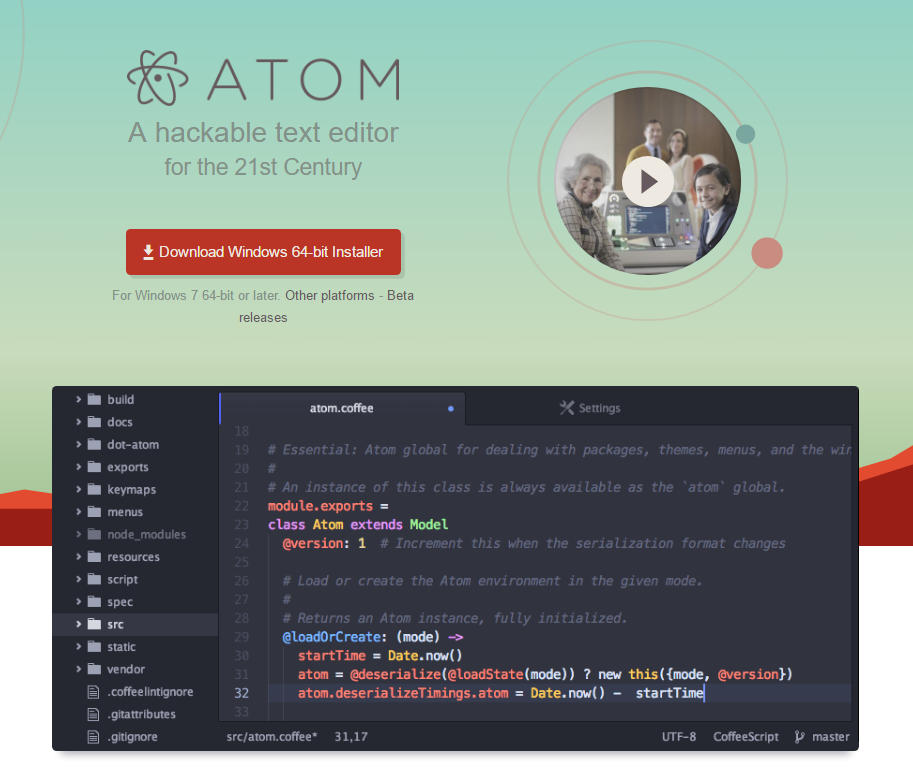
3. Brackets
Created by Adobe Systems, Brackets is a lightweight but powerful text editor with advanced features that include inline editing, live code previewing, preprocessor support, code folding, and command line integration.
It utilizes visual tools and preprocessor support that make it easy for both front-end developers and web designers to work from the browser.

4. Cloud 9
With Cloud 9, web and API development becomes much easier. It combines a powerful online editor with a full Ubuntu workspace in the Cloud so you can write, run, and debug your code.
Its key features include a built-in terminal, language and code completion tools, debugger, split view, and more. These functionalities can also be extended using a quite simple extension manager.
Name brands such as Soundcloud, Atlassian, Heroku, Mailchimp, and Mozilla work with Cloud 9.
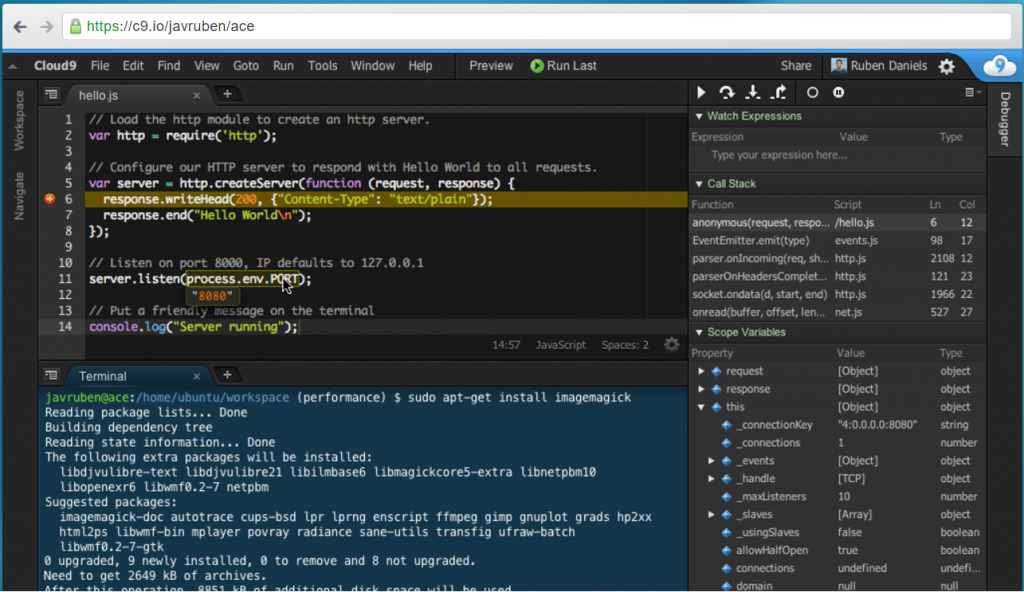
5. Codenvy
Codenvy also provides cloud workspaces for web designers and app developers to write, run, and debug on premise or in the cloud.
Developers can easily collaborate on a single project by using a shared URL. The team can work with their local IDE or the beautifully designed Eclipse Che cloud IDE.
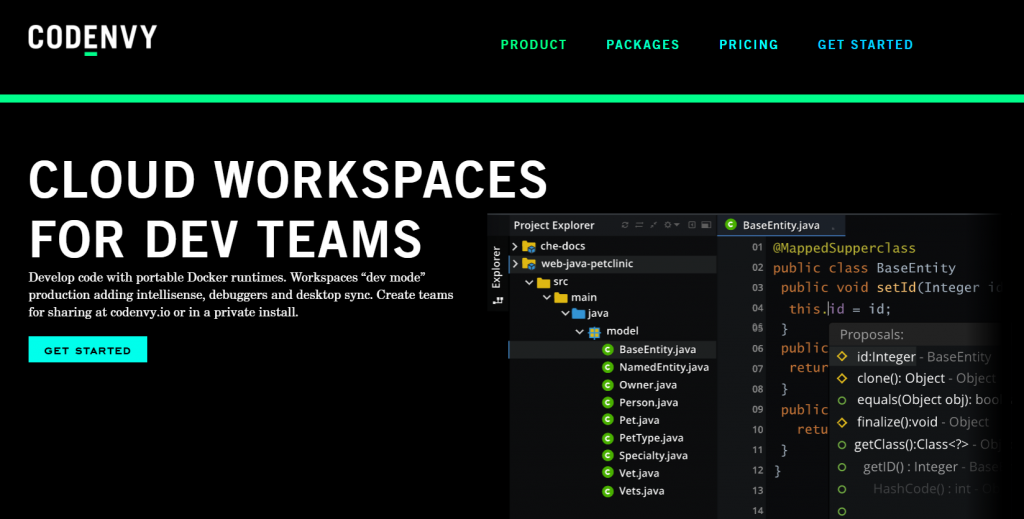
6. CodeLite
An open-source IDE that fully supports Node.js, CodeLite specializes in programming languages such as C, C++, PHP, and JavaScript. Some features include Node.js debugger, intelligent code completion, lightweight memory footprint, and compilers.

7. Eclipse
Known for its Java Integrated Development Environment (IDE), Eclipse is one of the most popular cloud-based IDEs for web developers. It’s capable of combining language support and other features into any default package. Because it has a very active community, you can find open source plugins and developer tools in the Eclipse Marketplace.
Eclipse is highly-customizable and extendable, with features such as built-in debugger, error checking, source code generation, code refactoring, help window as toy type, and more.
8. Intellij IDEA
Maximize your productivity with Intellij IDEA by Jetbrains, a robust IDE compatible with various technologies such as Node.js, Angular.js, JavaScript, HTML5, and more. Intellij IDEA offers intelligent code completion, code analysis, and refactoring tools.
Another advantage of Intellij IDEA is its productivity-boosting features for Java EE, Spring, GWT, Grails, Play, and other frameworks.
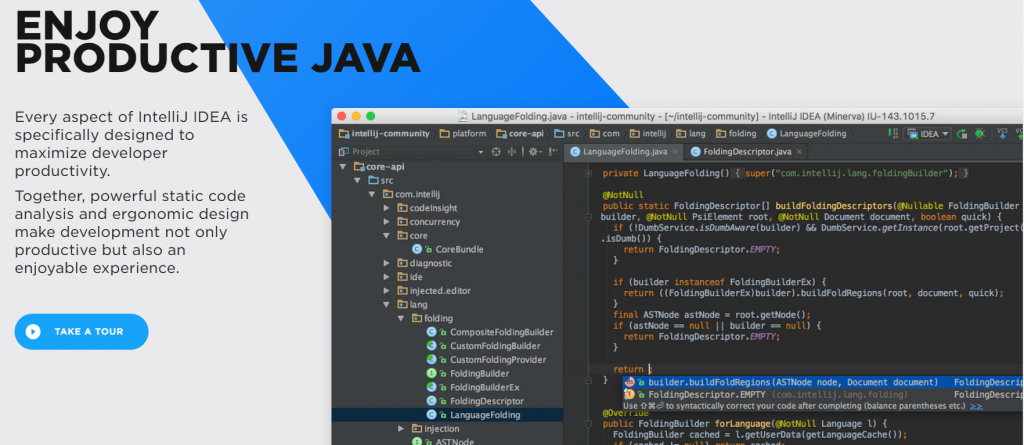
9. Koding
Koding is yet another open-source, cloud-based IDE that offers a smart interface that enables dev teams and managers to streamline their workflows. What’s great about it is its data analytics features for CTOs to locate bottlenecks and loopholes in the process to optimize efficiency and productivity.
Other features of Koding include syntax highlighting, keyboard shortcuts, collapsible panes, cloud workspace, auto indenting, code folding, and code preview using a built-in browser. Koding is ideal for large teams of hundreds or thousands of developers.

10. Komodo IDE
Komodo IDE is a cross-platform, polyglot IDE that provides a complete set of tools, integrations, and frameworks for a hassle-free web and application development. It supports over 100 programming languages such as Python, PHP, Go, Perl, Tcl, Ruby, NodeJS, HTML, CSS, JavaScript, and more.
Additional features of Komodo IDE include syntax and highlighting, code intelligence, debugging, markdown viewer, and DOM viewer. Komodo also offers multi-cursor support so that you can edit at the same time.

11. NetBeans
NetBeans is a free, modern IDE that supports multi-language programming for desktop, web, and mobile applications. Because it’s an open-source IDE, NetBeans allows developers to work on both the web and the desktop by building their own plugin to meet specific needs and functions.

12. Sublime Text
As an innovative text editor for code, markup, and prose, Sublime Text provides a state-of-the-art user interface that allows developers to easily jump to characters, symbols, lines, or words using keyboard shortcuts.
You can also use other advanced features such as split editing, project switching, and multiple selection to rename variables and manipulate your files quickly.
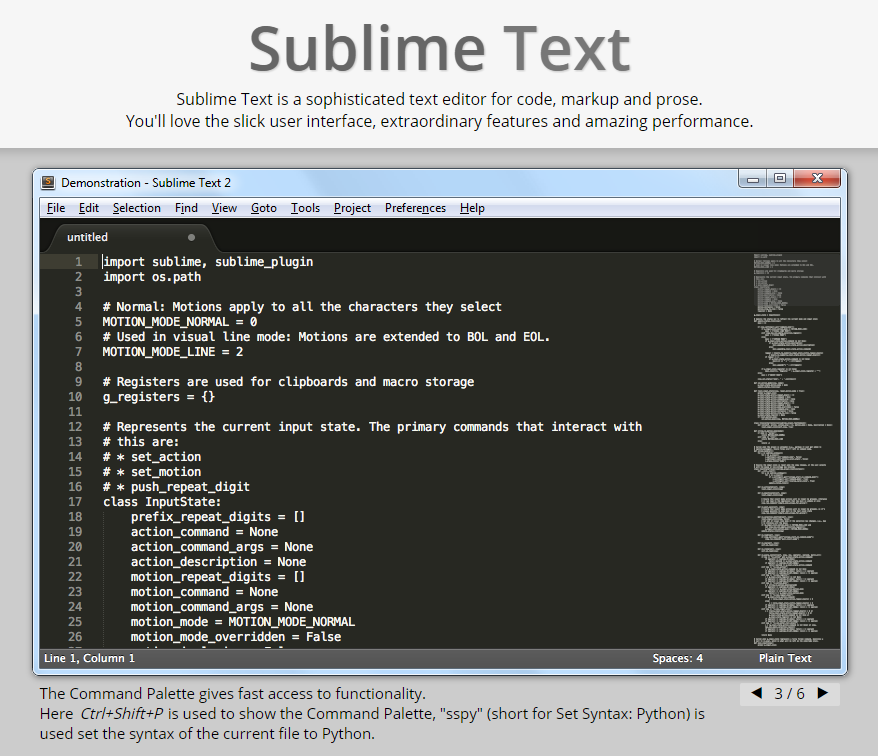
13. WebMatrix
Created by Microsoft, WebMatrix is a simple and lightweight IDE for Windows. It is ideally used for ASP.NET WebPages development and even PHP, HTML, and CSS. WebMatrix includes features such as code completion and built-in templates.
In October 28, 2016, Microsoft announced the discontinuation of formal support for WebMatrix starting November 1, 2017. Community support will continue in its forums.
14. WebStorm IDE
Jetbrains popularized another powerful IDE for modern JavaScript development. WebStorm IDE offers intelligent code completion, rapid error detection, navigation and refactoring for JavaScript, TypeScript, stylesheet languages, and other popular frameworks. The newest version of WebStorm can be integrated with Jest, and supports Vue.js and standard JS.
Developer teams of popular brands such as Yahoo!, Reuters, Soundcloud, Intuit, Wix, Expedia, and BMW use this robust IDE.

15. Visual Studio Code
Microsoft created Visual Studio Code to replace WebMatrix. Visual Studio Code is a free, open-source editor that runs on OS X, Windows, and Linux that supports operations such as debugging, embedded Git control, task running, and version control.
Other features include syntax and highlighting, IntelliSense code completion, and code refactoring. It supports more than 30 programming languages.
Additional tools and extensions are also provided for Node.js, TypeScript, JavaScript, ASP.NET 5, and more.
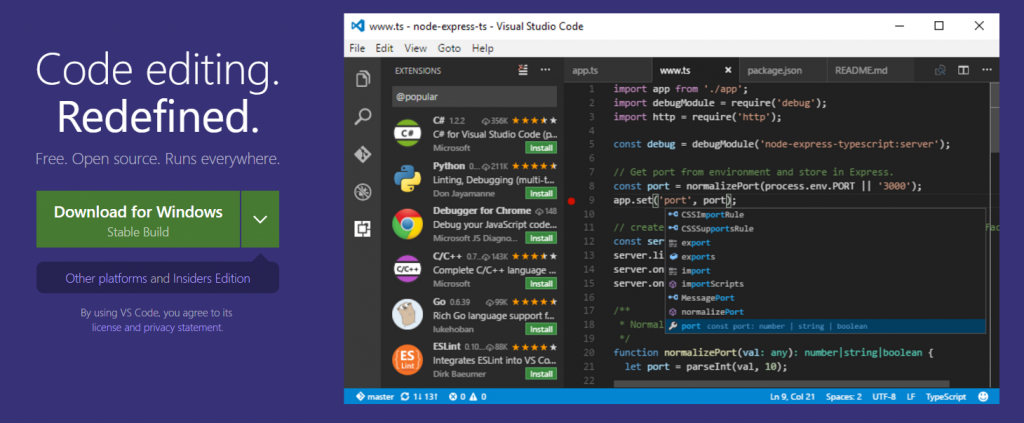
Final Words
Node.js is becoming increasingly popular for web and app developers worldwide. Frameworks, tools, and IDEs are useful for both beginners and professional users alike. It makes writing and testing codes a lot easier and faster