Introduction to iBeacons on iOS
Hello, I got my hands on some interesting devices from Estimote called iBeacons which they are used for sending signals to the users (iOS/ Android) phone using Bluetooth.
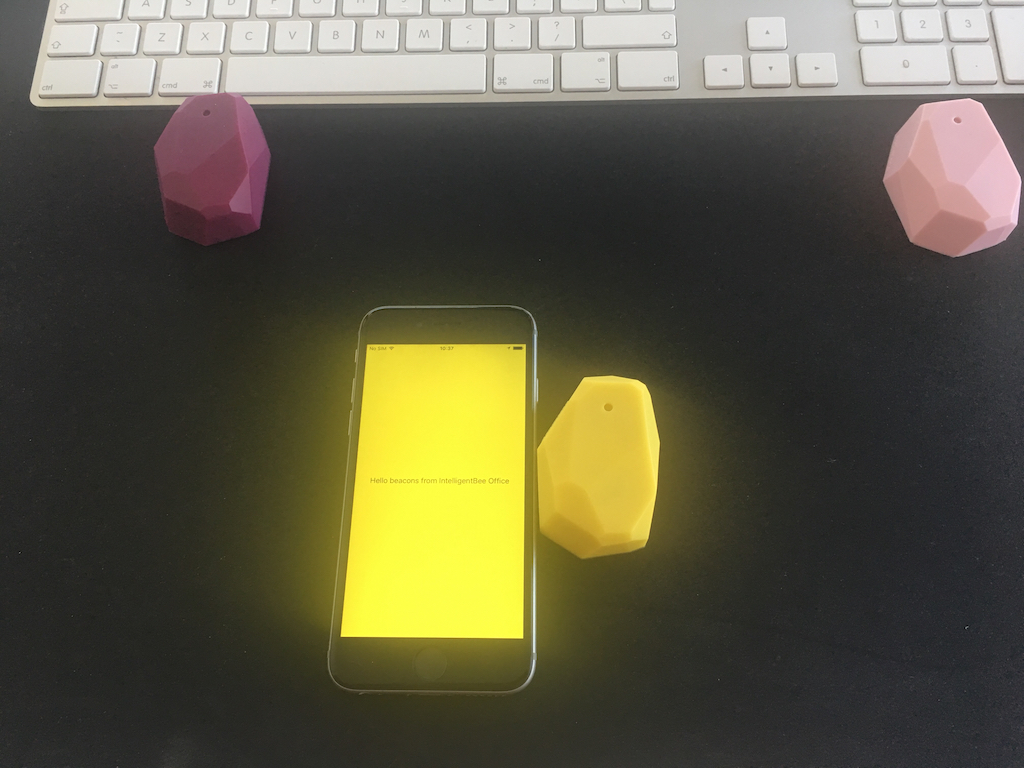
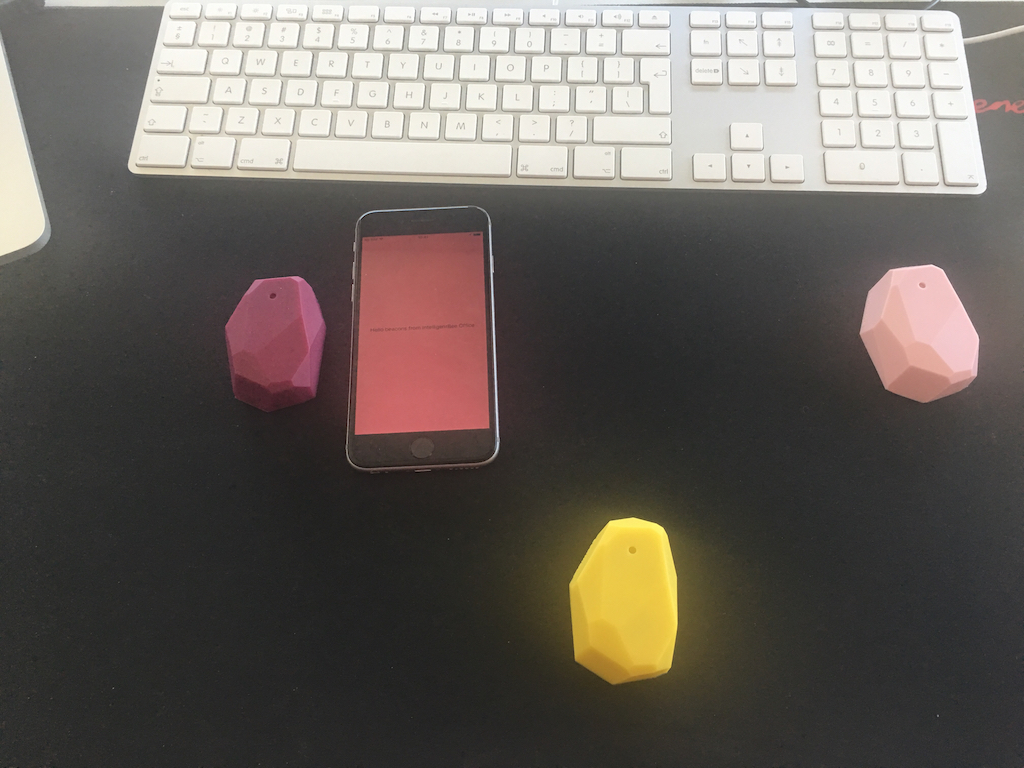
What I’m going to do next is to build an iOS app using these devices which changes the background color accordingly to the nearest one of these 3 beacons.
![]()
Introduction to iBeacons on iOS
The first thing that you have to do after you create a new project from XCode of Single View Application type is to install ‘EstimoteSDK’ using Cocoa pods. If you don’t have Cocoapods installed on your Mac please do it by following the instructions they offer.
From the terminal window use "cd" to navigate into your project directory and run "pod init". This will create a podfile in your project directory. Open it and under "# Pods for your project name" add the following line:
pod 'EstimoteSDK'
Then run "pod install" command in your terminal. After the installation of the cocoapod close the project and open the .workspace file and create a bridging header. Import there the EstimoteSDK with the code below.
#import <EstimoteSDK/EstimoteSDK.h>
Now let’s continue by creating a ‘iBeaconViewController’ with a UILabel inside of it having full width and height and the text aligned center, after this please create an IBOutlet to it and name it 'label' . Then set the new created view controller as the root view for the window.
 func application(_ application: UIApplication, didFinishLaunchingWithOptions launchOptions: [UIApplicationLaunchOptionsKey: Any]?) -> Bool {
        // Override point for customization after application launch.

        window?.rootViewController = UIBeaconViewController(nibName: String(describing: UIBeaconViewController.self), bundle: nil)

        return true
    }
The next step is creating the ‘BeaconManager’< file, you have it’s content below.
import UIKit

enum MyBeacon: String {

    case pink = "4045"
    case magenta = "20372"
    case yellow = "22270"
}

let BeaconsUUID: String = "B9407F30-F5F8-466E-AFF9-25556B57FE6D"
let RegionIdentifier: String  = "IntelligentBee Office"
let BeaconsMajorID: UInt16  = 11111

class BeaconManager: ESTBeaconManager {

    static let main : BeaconManager = BeaconManager()

}
But let’s first explain what is the purpose of each item in this file. So an iBeacon contains the following main properties, an UUID, MajorID, MinorID. All of these properties represents a way for the phone to know which device should listen to.
The MajorID is used when having groups of beacons and the MinorID is to know each specific device, the minor ids are represented in the MyBeacon enum among with the beacon color. The RegionIdentifier represents a way for the app to know what region are the beacons part of and it’s used to differentiate all the regions that are monitored by the app.
Now let’s go back on the UIBeaconViewController and start writing some action.
import UIKit

class UIBeaconViewController: UIViewController, ESTBeaconManagerDelegate {

    // MARK: - Props

    let region = CLBeaconRegion(
        proximityUUID: UUID(uuidString: BeaconsUUID)!,
        major: BeaconsMajorID, identifier: RegionIdentifier)

    let colors: [MyBeacon : UIColor] =
        [MyBeacon.pink: UIColor(red: 240/255.0, green: 183/255.0, blue: 183/255.0, alpha: 1),
         MyBeacon.magenta : UIColor(red: 149/255.0, green: 70/255.0, blue: 91/255.0, alpha: 1),
         MyBeacon.yellow : UIColor(red: 251/255.0, green: 254/255.0, blue: 53/255.0, alpha: 1)]

    // MARK: - IBOutlets

    @IBOutlet weak var label: UILabel!
You can guess what region does, it defines a location to detect beacons, pretty intuitive. The colors is an array which contains the mapping between the minorID and the color of each beacon.
// MARK: - UI Utilities

    func resetBackgroundColor() {
        self.view.backgroundColor = UIColor.green
    }

    // MARK: - ESTBeaconManagerDelegate - Utilities

    func setupBeaconManager() {
        BeaconManager.main.delegate = self

        if (BeaconManager.main.isAuthorizedForMonitoring() && BeaconManager.main.isAuthorizedForRanging()) == false {
            BeaconManager.main.requestAlwaysAuthorization()
        }
    }

    func startMonitoring() {

        BeaconManager.main.startMonitoring(for: region)
        BeaconManager.main.startRangingBeacons(in: region)
    }
The functions above are pretty self describing from their names, one thing I need to describe is Monitoring and Ranging. The monitoring actions are triggered when the phone enters/ exits a beacons area and the ranging is based on the proximity of the beacon.
    // MARK: - ESTBeaconManagerDelegate

    func beaconManager(_ manager: Any, didChange status: CLAuthorizationStatus) {

        if status == .authorizedAlways ||
            status == .authorizedWhenInUse {
            startMonitoring()
        }
    }

    func beaconManager(_ manager: Any, monitoringDidFailFor region: CLBeaconRegion?, withError error: Error) {
        label.text = "FAIL " + (region?.proximityUUID.uuidString)!
    }

    func beaconManager(_ manager: Any, didEnter region: CLBeaconRegion) {

        label.text = "Hello beacons from \(region.identifier)"
    }

    func beaconManager(_ manager: Any, didExitRegion region: CLBeaconRegion) {

        label.text = "Bye bye beacons from \(region.identifier)"
    }

    func beaconManager(_ manager: Any, didRangeBeacons beacons: [CLBeacon], in region: CLBeaconRegion) {

        let knownBeacons = beacons.filter { (beacon) -> Bool in

            return beacon.proximity != CLProximity.unknown
        }

        if let firstBeacon = knownBeacons.first,
            let myBeacon = MyBeacon(rawValue:firstBeacon.minor.stringValue)   {

            let beaconColor = colors[myBeacon]
            self.view.backgroundColor = beaconColor
        }
        else {
            resetBackgroundColor()
        }
    }

    func beaconManager(_ manager: Any, didFailWithError error: Error) {
        label.text = "DID FAIL WITH ERROR" + error.localizedDescription
    }
}
After the insertion of all the code, the app should run with no errors or warning and should look like this:


I hope this is a good introduction for iBeacons in iOS Mobile App Development. If you have any improvements or suggestions please leave a comment below.
You can get the code from here: https://github.com/intelligentbee/iBeaconTest